Blog

  • Japan’s Tax-Free Shopping Changes on 1 November 2026: What Actually Happens

    Japan’s Tax-Free Shopping Changes on 1 November 2026: What Actually Happens

    On 1 November 2026, Japan stops taking the tax off at the till and starts refunding it after you leave. If your trip straddles that date, this changes what you pack, what you can open, and how early you need to be at the airport.

    The call

    Travelling before 1 November 2026? Nothing changes. Show your passport, pay the lower price, keep the sealed bag sealed.

    Travelling after? You’ll pay the full price including 10% tax, then get that 10% back after a customs check at the airport. Budget for the cash-flow gap, and add half an hour to your departure plan.

    The genuinely good news, which is getting lost in the coverage: the new system abolishes the sealed-bag rule and the ¥500,000 daily cap on consumables. You’ll finally be able to buy skincare in Ginza and actually use it in your hotel that night. For most tourists that’s a real improvement, paid for with one extra queue.

    Japan tax-free shopping, before and after 1 November 2026 UNTIL 31 OCT 2026 Tax removed at the till You pay the lower price Cosmetics and snacks sealed in a bag you must not open ¥500,000 daily cap on those Nothing to do at the airport ¥5,000 minimum per shop FROM 1 NOV 2026 You pay the full price Refunded after departure No sealed bags at all Use what you bought No ¥500,000 cap Kiosk before bag drop ¥5,000 minimum stays Same 10% saved either way — it just arrives later, and only if you do the airport step.

    How it works now (until 31 October 2026)

    You show your passport, the shop deducts the consumption tax, and you walk out having paid the tax-free price. Two categories, two sets of rules:

    • General goods — clothes, electronics, bags. Use them freely in Japan.
    • Consumables — cosmetics, medicine, food, drink. Sealed in a tamper-proof bag you must not open until you’ve left Japan, capped at ¥500,000 per person per day, and must leave the country within 30 days.

    Minimum spend: ¥5,000 before tax, per shop, per day.

    How it works from 1 November 2026

    You show your passport, and you pay the full price, tax included. The refund comes later, and only after customs confirms the goods actually left with you.

    What changes:

    Rule Now From 1 Nov 2026
    When you save the 10% At the till After departure
    Sealed bags for cosmetics/food Required Abolished
    Consumables vs general goods Two categories Abolished — one rule
    ¥500,000 daily cap Yes Abolished
    Deadline to take goods out 30 days (consumables) 90 days
    Minimum spend ¥5,000 per shop/day ¥5,000 — unchanged
    Airport step None Required

    How you’ll be refunded depends on the shop: bank transfer, credit card refund, an e-money or QR app, or in some airport arrangements cash. There’s no single national method, so ask at the till how that shop refunds you — for a large purchase, this is worth knowing before you hand over the card.

    The airport step, which you cannot skip

    This is the part that will catch people out, because no one has ever had to do it before.

    1. Go to the tax-free procedure terminal in the international departure lobby — before you check your bags in. Once the suitcase is on the belt, you can’t get it back for inspection, and that’s the refund gone.
    2. Scan your passport. The system pulls up your purchases and gives you one of two answers.
    3. Green: done, no inspection, go and have a coffee.
      Red: take the actual goods to the customs inspection area.

    At Narita, Haneda, Kansai, Chubu, Fukuoka, New Chitose and Naha, you can do the first step through Visit Japan Web in the designated Wi-Fi zones of the departure lobby instead of queuing at a kiosk. Set that up in advance.

    Three things worth burning into memory:

    • Each receipt is checked as a unit. If one item from a receipt is missing or has been consumed, the whole receipt’s refund is refused.
    • Do it at your final departure point from Japan. Domestic connection to an international flight? It happens at the international airport.
    • Nobody holds your flight. Officials have said plainly that if you don’t finish in time, you lose the refund — and no one compensates a missed flight over it. Arrive early. In the first months, arrive very early.

    If your trip crosses the date

    There’s no overlap period: the old system runs to 23:59 on 31 October, and the new one starts at midnight.

    What matters is when you bought, not when you fly. Buy on 28 October and depart on 3 November, and that purchase was handled under the old rules — you already got the discount, nothing further to do. Buy on 2 November, and it’s a refund.

    Which means one genuinely useful piece of planning: if your trip spans the changeover, do your big shopping in October. You get the money immediately and skip the airport step entirely.

    The other tax: customs duty when you get home

    A lot of people reading this are planning a big purchase — a bag, a watch, a camera — because Japan’s prices plus the weak yen plus tax-free make it look irresistible. It often is. But the 10% you save here can be handed straight back at your own border, and the shop won’t warn you.

    Every country sets a personal allowance: the value of goods you can bring in without paying import duty and local VAT/sales tax. Above it, you declare and pay. The published figures, as of 2026:

    Arriving in Duty-free allowance Notes
    United States US$800 per person Families can combine allowances
    EU (by air or sea) €430 Then VAT at your country’s rate, plus duty on some goods
    United Kingdom £390 Above it, VAT at 20% on the full value, not just the excess
    Australia A$900 per adult Families can pool
    Canada C$800 after 48 hours away Shorter trips have lower limits
    Singapore S$500 after 48 hours away GST at 9% above it

    These change and have exceptions. Check your own customs authority before relying on a number here.

    The maths that matters: a ¥400,000 handbag is roughly US$2,700. Tax-free saves you about ¥36,000. If you then declare it in the US, duty on leather goods can run 8–10% of the full value — about the same amount you just saved. In the UK, 20% VAT on the whole price wipes the saving out several times over.

    Three honest points:

    • Not declaring is a gamble with real downside. Customs officers know what a Ginza shopping bag looks like, and penalties are a multiple of the duty owed.
    • Wearing it doesn’t exempt it. A watch on your wrist bought last week is still a new import.
    • Where the deal still works: mid-range purchases under your allowance, and countries with generous limits. A ¥100,000 haul of cosmetics, clothes and small electronics clears most allowances with room to spare. That’s where tax-free earns its reputation.

    Why Japan is doing this

    Because the old system was easy to abuse. Goods bought tax-free were meant to leave the country, but nothing verified that they did — so a resale trade grew up around it. One audit found nine ineligible buyers alone purchased ¥3.3 billion of tax-free goods in a single year, dodging around ¥340 million in tax; one individual’s purchases topped ¥1.3 billion.

    Moving the check before the money closes the loophole. It’s also how most of the world already does it — anyone who has claimed VAT back at a European airport will find the new Japanese process familiar.

    What this means for you, practically

    • Carry more headroom on your card. Everything costs 10% more at the moment of purchase. On a ¥200,000 camera that’s ¥20,000 of float.
    • The refund isn’t instant. Money moves after customs confirmation, on the shop or refund agent’s timeline.
    • Watch the exchange rate and fees. Refunded to a foreign card, your 10% comes back in yen converted on a later date, possibly minus a handling fee. What you get back may not exactly match what you “saved.”
    • Keep receipts and goods accessible until the airport step is done. Not in the checked bag.
    • Some small shops may stop offering tax-free entirely. Retailers have to front the refund and handle the admin, and industry commentary expects some independents to walk away. Department stores and chains will be fine.

    FAQ

    Is the tax rate changing?
    No. 10% standard, 8% on food and non-alcoholic drinks. Only the mechanism of getting it back changes.

    Can I still buy cosmetics and use them in Japan?
    From 1 November, yes — and this is the biggest practical win of the reform. No more sealed bag, no more travelling with an unopened parcel of skincare.

    What if I use something and then can’t claim?
    Only that receipt is affected. Tell a customs officer rather than trying the kiosk and hoping.

    Do the department store tax-free counters disappear?
    No. They’ll continue, and any service fee they charge is their own, separate from the government refund.

    Can I post things home and still claim?
    No. Separate shipment was abolished back in March 2025. Goods leave with you, in your luggage.

    How much time should I allow at the airport?
    No official figure has been published. Treat the usual three-hour international check-in advice as a minimum, and if you’ve bought a lot, add an hour. The first few months will be the worst.

    The bottom line

    Same 10%, later. You trade an instant discount for one queue at the airport, and you get back the freedom to open what you bought — which, for most people spending an afternoon in a Tokyo drugstore, is the better deal.

    Related: airport shopping and how duty-free differs, the Don Quijote coupon.

    The single mistake to avoid: doing the tax-free step after you’ve checked your bags. Terminal first, then check-in. In that order.

    Related: what’s actually worth buying in a Japanese drugstore.


    Based on Japan Tourism Agency and National Tax Agency guidance as of August 2026. Operational details, particularly refund methods, are still being finalised by individual retailers — confirm at point of purchase. Corrections via the contact page.
  • Luggage Storage in Tokyo (2026): Lockers, Left-Luggage Counters and Where to Actually Find Them

    Luggage Storage in Tokyo (2026): Lockers, Left-Luggage Counters and Where to Actually Find Them

    Checkout is 10am, your flight is at 9pm, and you have a large suitcase and eleven hours. Here’s the whole decision, in order of what to try first.

    The call

    Ask your hotel first. It’s free, it’s standard practice in Japan, and it works both before check-in and after checkout. Most travellers skip straight to hunting for a locker and pay ¥800 they didn’t need to spend.

    If you have no hotel that day: book a storage slot online (¥500–800 per bag) rather than trusting you’ll find an empty locker. Big lockers in central Tokyo on a weekend are a genuine lottery.

    If the bag needs to be somewhere else — your next city, the airport, tomorrow’s hotel — that’s not storage, that’s luggage forwarding, and it’s a different (better) answer.

    Where does this bag go? How long do you need it gone? A few hours All day, big case It should meet me somewhere else Coin locker ¥300–1,000 / day Cheapest. Often full. Check vacancy first. Booked storage ¥500–800 / bag / day Any size, guaranteed. Shop hours apply. Takkyubin ¥1,600–3,700 Next day, hotel to hotel. Ship, do not carry. Free option first: if you have a hotel that day, they will hold it. Just ask. Coin lockers are emptied after 3 days · booked storage and couriers are not

    Option 1: your hotel (free)

    Japanese hotels and ryokan will hold your bags on the day you check in and the day you check out, as a matter of course, at no charge. You don’t need to negotiate it — the phrase is “nimotsu wo azukete kudasai,” but “can you hold my bag?” works fine at any hotel with foreign guests.

    Limits worth knowing: it normally covers that day, not several days. Larger chain hotels will often hold bags for longer on request; a small ryokan may not. And this only applies if you’re a guest — hotels don’t store bags for the general public, so if you checked out yesterday, this option is closed.

    Option 2: coin lockers (¥300–1,000/day)

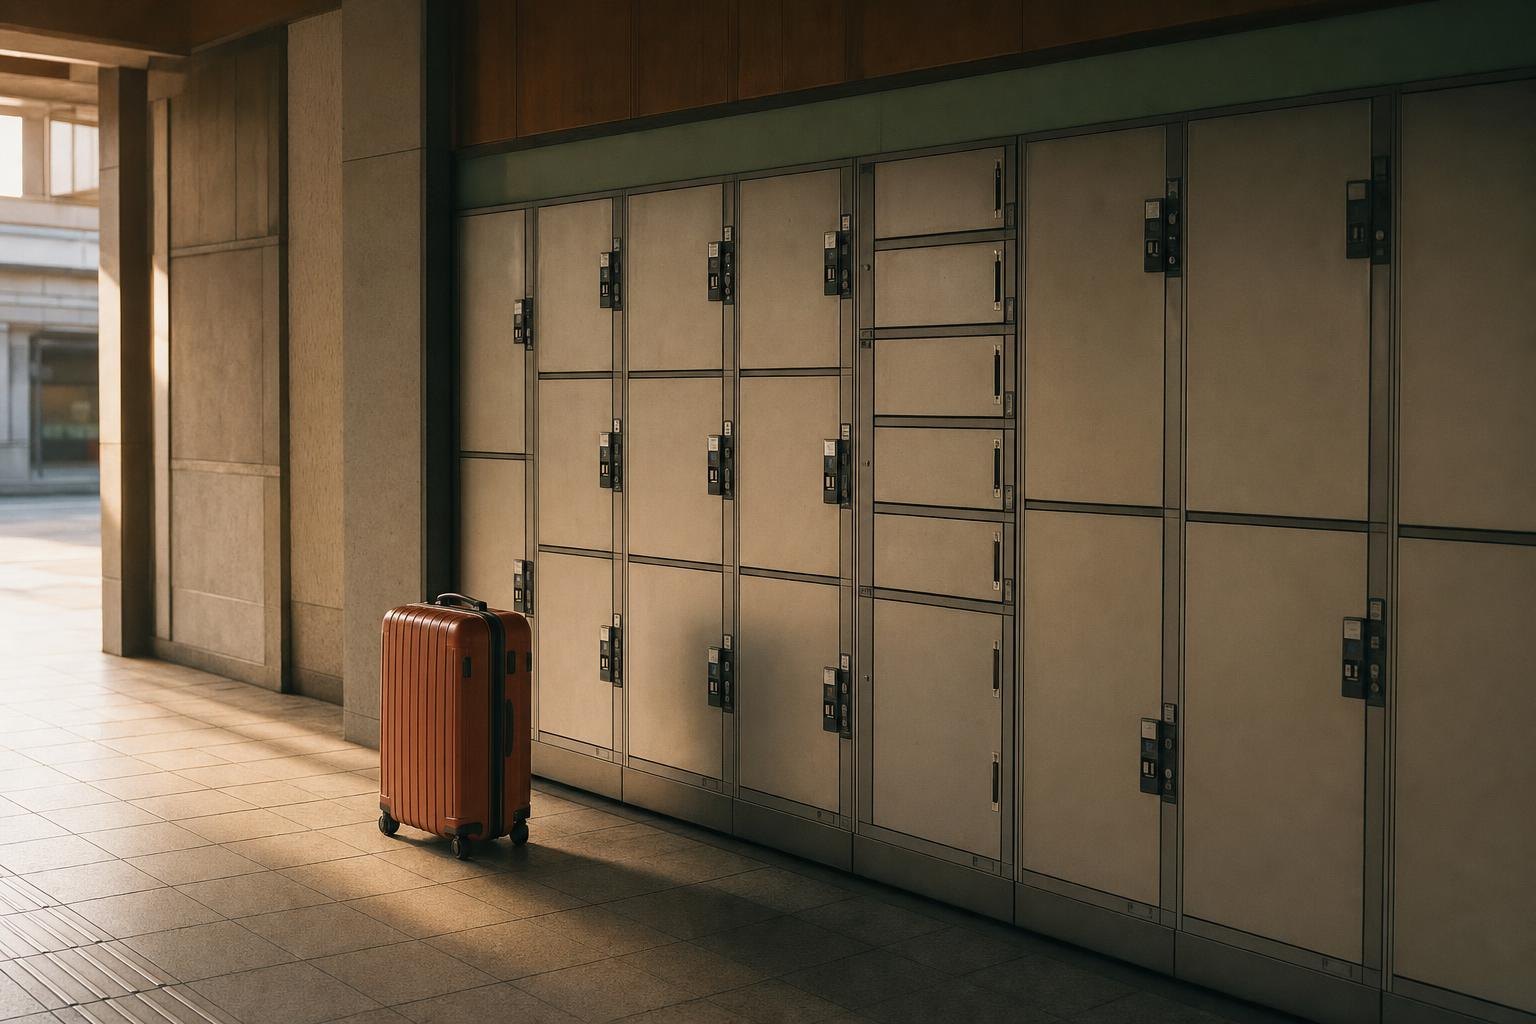
    Still the cheapest paid option, and Tokyo has an enormous number of them — roughly 3,600 at Shinjuku, over 1,500 at Tokyo Station.

    Size Fits Price/day
    Small (~35×31×64cm) Backpack, tote ¥300–500
    Medium (~35×54×64cm) Cabin bag ¥400–700
    Large (~35×83×64cm) Large suitcase ¥600–1,000

    Most central Tokyo lockers now take Suica or PASMO, and newer machines accept QR payments. Some older ones are still ¥100 coins only, so keep a few.

    The catch: large lockers fill up. On a weekend morning at Tokyo, Shinjuku, Shibuya or Ueno, and during Golden Week, Obon or peak blossom season, assume the big ones are gone by mid-morning. Before you drag a suitcase around a station guessing, use a vacancy checker — Locker Concierge and Coin Locker Navi show real-time availability, and several stations have Suica locker-search kiosks with colour-coded maps.

    The other catch: the limit is three calendar days, not 72 hours. After that staff empty the locker and your things go to a storage facility, which is a bad afternoon to have.

    Option 3: booked storage (¥500–800/bag/day)

    You book online, drop your bag at a partner shop, café or hotel, and collect it later. The advantage over a locker is certainty: you reserved a space, so it exists, and the price is flat regardless of how absurd your suitcase is.

    • ecbo cloak: ¥500/day for bags under 45cm, ¥800/day for suitcases. 2,500-plus locations nationwide. Since late 2025 this includes several hundred 7-Eleven stores — a meaningful upgrade, because convenience stores are everywhere and some are open around the clock.
    • Radical Storage: flat rate from around ¥600/day per bag in most of Tokyo, any size, with insurance included. Good coverage across the tourist wards.

    The one thing to check: your bag lives inside someone else’s business, so you’re bound by that shop’s opening hours. Book a café that closes at 6pm and you have a 6pm problem. Read the hours before you book, not after.

    Reserve a spot

    Flat rate per bag per day, any size, insured. Booking ahead beats hunting for an empty locker on a Saturday.

    Find luggage storage in Tokyo →

    Option 4: staffed counters

    For genuinely oversized things — skis, a bike box, the suitcase that defeats large lockers — use a counter.

    • Tokyo Station, JR East Travel Service Center: around ¥500 (small) to ¥2,000 (over 200cm total dimensions), roughly 8:30am–7pm. Same-day only — this is not overnight storage.
    • Sagawa Express service centre near Tokyo Station: flat ¥800/day, open 7am–11pm. Better hours than the JR counter, and worth knowing about.
    • Haneda Airport: ¥300 (under 120cm) to ¥900 (200–300cm) per item per day, up to two weeks.
    • Narita Airport: from roughly ¥520/day at manned counters, up to eight days.

    Station by station: where the lockers actually are

    The general advice above is fine until you’re standing in Tokyo Station with a 28-inch case and no idea which of 26 locker banks to try. So here’s the specific version.

    Station-by-station deep dives: Tokyo Station · Shinjuku · Shibuya · Asakusa & Ueno. The summaries below are the short version of each.

    Tokyo Station

    Roughly 5,000 lockers spread across about 26 locations — and still the hardest station in the city to find an empty large one. The reason is geography: the Marunouchi side (Imperial Palace, tourists) has relatively few lockers and mostly small ones, while the Yaesu side (Shinkansen, buses) holds most of the capacity. If Marunouchi is full, walk through to Yaesu before giving up. A new locker hub under the Yaesu bus terminal reportedly added a few hundred units in 2026, including XL sizes.

    Staffed options if the lockers defeat you: the JR East Travel Service Center at the Marunouchi North Exit (8:30–19:00, roughly ¥500–2,000 by size, same-day only), GRANSTA Cloak inside the Yaesu underground central gate (open until 21:00), and the Sagawa Express service centre in First Avenue near the Nihonbashi Exit (7:00–21:00). Suica locker-search kiosks in the station show which banks have space — use them before walking.

    Shinjuku Station

    The largest locker inventory in Tokyo, which is why it’s the one station where wandering usually works. The biggest single cluster is underground at the West Exit (B2, via the JR West Exit gates). Large suitcase-size lockers are concentrated around the East Exit near Studio Alta. Two more clusters sit by the New South Gate on the 2nd floor, right by Busta Shinjuku — convenient if you’re catching a highway bus to Fuji or Nikko.

    Inside Busta itself (4F) the lockers are time-based rather than daily, and the price climbs quickly — fine for a two-hour wait, poor value for a full day. No dedicated staffed baggage counter that we could confirm, so if you need one, Tokyo Station or a booked-storage shop is the answer.

    Shibuya Station

    Close to a thousand lockers across the JR, Metro and Keio stations, and yet the ones by the Hachiko Exit are full from mid-morning on any weekend. Two reliable fall-backs: the locker bank on the 1st floor of Shibuya Scramble Square (in front of the elevators) and B3 of Hikarie, next to the restrooms. Shibuya also has among the densest booked-storage coverage in the city — cafés and shops that take bags via app — so on a Saturday it’s often faster to reserve than to hunt.

    Ueno Station

    Around 300 lockers. The Shinobazu Exit has lockers just inside the gate and more in the connecting passage; the Park Exit has a bank right after the gates facing the park. Cited prices here run ¥500 small / ¥800 large. The practical reason people need Ueno storage: the museums. The Tokyo National Museum has free lockers but they’re small and often full — leave the suitcase at the station, take a daypack into the park. Shinobazu Exit is also the one that faces Ameyoko market.

    Asakusa

    Locker-poor for how many visitors it gets. The largest bank is on the 2nd floor of Tobu Asakusa Station; Toei Asakusa has touch-screen lockers by both gates at ¥300/500/700. Expect them to be full by late morning in high season. Staffed alternatives: the Yamato counter on the 1st floor of Ekimise (the Tobu station building, 10:00–19:00, about ¥500 a bag) and the Sagawa service centre near Kaminarimon (9:00–19:00, ¥800 a bag). Asakusa is also one of the best-covered areas for booked storage, which for a temple-and-lunch afternoon is the least stressful option.

    Narita and Haneda

    Haneda is straightforward: temporary baggage storage counters in every terminal (T1 and T2 at B1, 8:00–19:30; T3 counters run 24 hours), priced ¥800 small / ¥1,000 medium / ¥2,000 large per day, up to two weeks, max 30kg. Narita has JAL ABC and Sagawa counters in T1 and T2 (1F before security, roughly 6:30 until the last arrival) — note there’s no staffed storage in Terminal 3, so budget LCC passengers should walk to T2. Prices vary by operator and size; expect ¥500–1,100 a day.

    German readers: yes, these are the Schließfächer — same system, and the vacancy tools below work in any language.

    Finding an empty locker before you walk

    • LuggageSnap — real-time coin-locker availability by station, in English, updated every few minutes. Has a Tokyo Station page
    • Suica locker-search kiosks — touch screens at Tokyo, Shinjuku, Ikebukuro and Shinagawa showing colour-coded availability maps. Only useful once you’re there
    • ecbo cloak app — not lockers, but real-time availability at partner shops and 7-Elevens, bookable in English. Since late 2025 that includes several hundred 7-Eleven stores, some open around the clock

    Skip the locker hunt

    At Tokyo Station, Shibuya or Asakusa on a weekend, a reserved spot beats twenty minutes of walking between full locker banks. Flat rate per bag, any size, insured.

    Reserve luggage storage in Tokyo →

    Storage or forwarding? The dividing line

    Simple rule: if the bag needs to end up where you started, store it. If it needs to end up where you’re going, ship it.

    Takkyubin courier forwarding runs roughly ¥1,600–3,700 depending on size, and typically arrives next day (same-day only for short local routes if you drop off in the morning). It’s more per bag than a locker — and completely worth it when the alternative is hauling two suitcases through Shinjuku Station at rush hour to reach a Shinkansen.

    One thing worth knowing before you assume forwarding is a faff: you can hand a suitcase over the counter at a 7-Eleven or FamilyMart, at any hour, including sending it to Narita or Haneda. It is not a hotel-front-desk-only service, and that changes when it is useful. How to do it without Japanese.

    Full breakdown in our guide to sending luggage ahead in Japan.

    What actually goes wrong

    • “All the big lockers were full.” The single most common complaint, and entirely predictable at weekends. Check vacancy online, or book storage instead.
    • “I couldn’t find the lockers.” Shinjuku’s are scattered across multiple exits and levels. Note which exit you used, or take a photo of the locker bank and its number. People do lose lockers.
    • “My suitcase didn’t fit the large locker.” Oversized hard cases sometimes don’t. Counters and booked storage have no such problem.
    • “I left it for four days.” Three-day limit. Use booked storage for anything longer.

    FAQ

    Can I leave a bag overnight?
    Coin lockers: yes, up to three days, paying per day on retrieval. Booked storage: yes. JR staffed counters: no — same-day only.

    Is it safe?
    Yes, remarkably. Japan’s low-theft reality extends to left luggage, and booked services add insurance on top. Passports and valuables still ride with you.

    Do I need cash?
    Less and less. Most central Tokyo lockers take IC cards, and booked storage is prepaid online. Carry a few ¥100 coins anyway for older machines.

    What about the airport on my last day?
    If you’re flying out, don’t store — check in early. Most airlines accept bags several hours before departure, and once your suitcase is on the belt you’re free until boarding, for nothing.

    The bottom line

    Hotel first, because it’s free. Booked storage second, because it’s certain. Coin locker third, because it’s cheapest when it works. Courier when the bag is going somewhere you aren’t.

    And a small piece of advice that saves more hassle than any of the above: on the day you leave Tokyo, decide where the suitcase sleeps before you check out — not while standing outside the hotel with it.


    Prices as of August 2026 and subject to change. Corrections via the contact page. Some links here are paid affiliate links.
  • Mt. Fuji Day Trip from Tokyo: Tour or DIY? (2026)

    Mt. Fuji Day Trip from Tokyo: Tour or DIY? (2026)

    The honest version: this is one of the rare cases where the guided tour is both cheaper and better. Here’s the maths, and the two situations where DIY still wins.

    The call

    Take a guided coach tour if this is a one-day trip and you want to see more than one thing. Around ¥7,500–8,500 gets you transport, a guide, and three or four stops that are genuinely annoying to link by public transport. Doing the same day yourself costs more.

    Go DIY if you’re staying overnight in Kawaguchiko, if you’re travelling with kids who need to bail out at any moment, or if you want to chase the clear morning sky on your own schedule rather than a coach’s.

    And before anything else: Fuji is invisible more often than travel photos suggest. Summer is the worst season for it. Build a day you’d enjoy even if the mountain never appears — because there’s a real chance it won’t.

    What a day at Mt. Fuji actually costs per person, one adult, August 2026 DIY by bus ¥9,000 to ¥10,500 Highway bus both ways + local bus pass + ropeway, cruise, lunch Guided coach tour ¥7,500 to ¥8,500 Transport, guide, 3–4 stops, admissions included Lunch usually extra DIY by train ¥13,000 to ¥14,500 Fuji Excursion express Comfortable, reserved seat Sells out a month ahead The surprise: the guided tour is usually the cheapest way to do it properly.

    Why DIY costs more than you’d think

    The train fare isn’t the problem. The problem is that the good stuff around Lake Kawaguchi is spread out, and each piece has its own ticket.

    DIY, one adult, one day Cost
    Fuji Excursion limited express, Shinjuku→Kawaguchiko round trip ~¥8,300
    (or highway bus from Busta Shinjuku, round trip) ~¥4,400
    Kawaguchiko sightseeing bus pass (2-day) ¥1,500
    Mt. Fuji Panoramic Ropeway, round trip ¥1,000
    Lake Kawaguchi cruise ¥1,000
    Lunch (hōtō noodles, the local thing) ~¥1,500
    Total by train ~¥13,000–14,500
    Total by highway bus ~¥9,000–10,500

    Now compare a standard full-day coach tour from Tokyo: roughly ¥7,500–8,500, including transport, an English-speaking guide, and admissions to three or four stops — typically Arakurayama Sengen Park (the pagoda-and-Fuji photo), Oshino Hakkai spring village, Lake Kawaguchi or Oishi Park, and the Fuji 5th Station when the road is open. Lunch is usually extra.

    The tour is cheaper than the train version and only slightly more than the bus version — and the bus version leaves you standing at bus stops in Kawaguchiko working out timetables.

    Book the tour

    Full-day coach tours from Tokyo, around ¥7,500–8,500 with a guide and 3–4 stops. Cancellation is usually free up to 24 hours ahead.

    See Mt. Fuji day tours →

    The Fuji Excursion problem

    If you do want the train, know how it works. The Fuji Excursion runs Shinjuku to Kawaguchiko direct in about 1 hour 53 minutes for roughly ¥4,130 each way. It’s comfortable, it’s scenic, and it is entirely reserved — there is no non-reserved carriage to fall back on.

    Reservations open exactly one month before your travel date, at 10:00 Japan time. Convenient daytime departures on weekends disappear fast, and during Golden Week and Obon they can go in a day. Set an alarm for that 10:00 window, or plan around the highway bus.

    If it’s sold out: the highway bus from Busta Shinjuku costs from about ¥2,200 and takes 1 hour 35 minutes. It’s not romantic, but it’s cheaper, more frequent, and often faster.

    The 5th Station, honestly

    Most day-trippers who go up Mt. Fuji don’t climb it — they ride a bus to the 5th Station at 2,300m, look at the view, buy something, and come back down. That’s a perfectly good day and requires no permit, no fee and no fitness.

    Two things to know for summer 2026:

    • Private cars are banned on the Fuji Subaru Line from 3 July to 10 September 2026. A shuttle bus runs from Fuji-Hokuroku Parking, ¥3,400 round trip. This is why tours pick you up in Tokyo rather than expecting you to drive.
    • The ¥4,000 trail fee and 4,000-climbers-a-day cap that made the news apply to people climbing past the 5th Station, not visitors. If you’re not going above the gate, it doesn’t concern you.

    Outside the summer season the road can close entirely for snow, which is why good tours state upfront that they’ll substitute Arakurayama Sengen Park or Oishi Park if the 5th Station isn’t reachable. That flexibility is a genuine argument for booking a tour rather than building a DIY plan around a road that might be shut.

    Will you actually see Mt. Fuji?

    This is the part most guides skip. Long-run observation data puts full visibility at roughly 140–155 days a year. The pattern is consistent and worth planning around:

    • Best months: November to February. Cold, dry air, and a genuine coin-flip chance or better on any given day.
    • Worst months: June to August. Summer humidity builds cloud around the peak even on days that feel gloriously sunny in Tokyo.
    • Best time of day, always: early morning. Convective cloud builds as the ground warms, so the mountain that was crisp at 8am is often gone by 1pm.

    That last point quietly settles the tour-versus-DIY question for a lot of people. Coach tours leave Tokyo at 7–8am precisely because of it. A DIY day that starts with a 9:30 train arrives at the good viewpoints right as the cloud does.

    About that pagoda photo

    Arakurayama Sengen Park — the five-storey pagoda with Fuji behind it — is on every Japan mood board, and everyone who saw that mood board is now in the queue. At peak times the viewing deck can involve waits approaching two hours. The crowding got serious enough that the town cancelled the park’s 2026 cherry blossom festival outright.

    It’s still worth doing. Just go early, and go knowing that the postcard was taken at 6am on a Tuesday in December.

    Which is right for you

    • Solo traveller, one day, first visit → Tour. Cheapest, simplest, someone else watches the clock.
    • Couple with a flexible schedule → Tour on a weekday, unless you’re staying over.
    • Family with young kids → Private car or DIY. A ten-hour coach day with fixed stops is a long time to be trapped with a bored six-year-old. A private tour split three or four ways is often reasonable.
    • Staying overnight in Kawaguchiko → DIY, obviously. Buy the 2-day bus pass, go up the ropeway at sunset, and get the clear morning to yourself.
    • You mostly want the mountain in a photograph → Go in winter, go early, and consider that a Hakone day gets you Fuji views plus an onsen. (We compared Hakone, Nikko and Kamakura here.)

    FAQ

    Can I use a Japan Rail Pass for this?
    Only partway. The Fuji Excursion runs onto the private Fujikyu line beyond Otsuki, and that section isn’t covered — expect to pay the difference. Whether a rail pass makes sense for your trip at all is a separate calculation, which we did here.

    Is one day enough?
    For a first look, yes. For the Fuji Five Lakes properly, no — two days with a night in Kawaguchiko is the version people come back raving about.

    What if the weather is bad?
    Tours run regardless and swap stops as needed. If you’ve booked DIY train tickets and wake up to rain, you’re committed. That asymmetry is worth something.

    Is the 5th Station worth it if I can’t see the summit?
    Honestly, not really. It’s a car park with shops at high altitude. On a clouded day, Oshino Hakkai and the lakeside are better use of the hours.

    The bottom line

    For a single day from Tokyo, book the coach tour: it costs less than assembling the same day yourself, it starts early enough to beat the cloud, and it reroutes itself when the mountain road is closed. Go DIY when you’re staying the night, travelling with small children, or you genuinely want to sit in a comfortable train and watch Japan go past.

    And go in winter if you can. The mountain shows up.

    Ready to book

    Tours sell out on weekends in autumn and spring. Check what is left for your dates.

    Check tour dates and prices →


    Fares and tour prices as of August 2026 and revised regularly — confirm before booking. Corrections via the contact page. Some links here are paid affiliate links.
  • teamLab Planets or Borderless? How to Pick (2026)

    teamLab Planets or Borderless? How to Pick (2026)

    Both are extraordinary. Only one fits your trip. Here’s how to pick in 30 seconds — then the details, if you want them.

    The call

    Choose teamLab Planets if you want to feel the art — you’ll be barefoot, wading through knee-deep water, lying on your back under projected flowers. It’s shorter (1.5–2 hours), it’s a single fixed path, and it’s the better first-timer’s teamLab.

    Choose teamLab Borderless if you want to get lost in the art — no map, no route, 75-plus works that spill into each other and move between rooms. It’s longer (2–3 hours), more cerebral, and better if you’re the type who reads every museum label.

    Doing both? Genuinely fine — they share a name and a studio but almost nothing else. Just don’t do them on the same day. Two sets of infinite mirror rooms in one afternoon is more than a brain wants.

    Two teamLabs, two entirely different afternoons PLANETS Toyosu Barefoot. In the water. One fixed path. 1.5–2 hours Best for: first-timers, kids, a tight schedule BORDERLESS Azabudai Hills Shoes on. No water. No map at all. 2–3 hours Best for: wanderers, repeat visitors, long afternoons Both indoor · both timed-entry · book weeks ahead

    The comparison, side by side

    teamLab Planets teamLab Borderless
    Where Toyosu — 1 min from Shin-Toyosu Stn (Yurikamome) Azabudai Hills — 2 min from Kamiyacho Stn (Hibiya Line)
    Adult ticket from ¥3,600 (dynamic, to ~¥4,800) ¥3,600–5,600 (dynamic)
    Kids 4–12 ¥1,500 ¥1,500 and up
    Time needed 1.5–2 hours 2–3 hours
    Route One-way, linear No map, wander freely
    Water Yes — barefoot, knee-deep None
    Hours 8:00–22:00 ~10:00–21:00, closed 1st & 3rd Tue
    Running until End of 2027 (confirmed) Permanent, no end date

    Both use dynamic pricing — the same ticket costs more on a Saturday afternoon than a Tuesday morning. Check the official sites for your exact date.

    Get tickets

    Both museums sell timed slots that disappear weeks ahead. Klook is an authorised seller for both and shows the remaining slots in one place.

    Check teamLab ticket availability →

    Or book direct: Planets official · Borderless official

    What Planets actually feels like

    You take off your shoes and socks at the entrance and don’t put them back on for two hours. That’s the whole design principle: the art meets your skin.

    You wade through a dark room where projected koi swim around your legs and burst into flowers when they touch you. You lie down on a mirrored floor under a canopy of thousands of hanging orchids that descends toward your face. You climb through an inflatable landscape that behaves like a bouncy castle designed by someone who has read too much philosophy.

    Practically: wear or bring shorts. The water goes above the knee in places, and while there are free rental shorts (XS to 6L) and towels, you don’t want to spend your visit in a queue for them. Wet clothes will block you from the next room until you change. If you’re wearing a skirt, note that several floors are mirrors — the same free shorts solve it.

    It’s the more photogenic of the two in the obvious Instagram sense — the water-and-light rooms are absurd in the best way. It’s also the more physical: 2.5 million people came in 2025, and the crowd moves as one along the fixed path, which is both efficient and, at peak times, a bit like a very beautiful conveyor belt.

    What Borderless actually feels like

    There is no map. That is not an oversight — the works wander out of their rooms, walk down corridors, and interrupt each other. You are meant to be slightly lost.

    The upside: genuine discovery, and rooms you stumble into that you’d never have found on a route. The downside, and it’s a real one, is that the most famous work — the Infinite Crystal Universe, all suspended LED strings — can be hard to locate and can carry a queue of an hour or more at peak times. Visitors say this consistently.

    Through October 8, 2026, Borderless is running On the Asymmetry of the Universe in the reopened Light Sculpture – Flow room, with new series that haven’t been shown before. If you’re deciding between the two and you like a bit of novelty, that tips it.

    No water here, so no shorts required — but the mirrored floors are extensive. Trousers are the low-stress choice.

    Which one for whom

    • Young kids → Planets, with a caveat. The linear path means you can’t lose them, and the Athletics Forest is a genuine playground. But it’s dark, the floors are wet, and there’s a minimum height requirement for the water works (small children get carried). Under-13s need an adult.
    • Teenagers → Either. Borderless if they’re the moody-artistic kind, Planets if they want the photos.
    • Rainy day → Both are fully indoor. Slight edge to Borderless: Planets’ outdoor queue area has limited shelter, and standing in the rain before taking your shoes off is a poor start.
    • Limited time in Tokyo → Planets. Two hours, done, and Toyosu Market is next door for lunch.
    • You’ve been to a teamLab exhibition abroad → Borderless. The permanent Tokyo works go further than the travelling shows.
    • Mobility concerns → Planets involves uneven, wet, sloped surfaces and barefoot walking. Borderless is easier underfoot but involves more total walking and nowhere obvious to sit.

    Booking: the part people get wrong

    Both sell timed entry slots, released roughly two to three months ahead. Weekend and holiday slots can vanish within days of release during cherry blossom season, Golden Week, Obon and New Year.

    • Weekday visit: book about a month ahead
    • Weekend or peak season: book 2–3 months ahead
    • Same-day tickets: don’t plan on it. Planets sells no tickets on site at all. Borderless has a booth, but treat any stock as a lucky accident.
    • If your preferred time is gone: try the very first slot of the day or a late evening one. Both are less contested and — this matters — noticeably less crowded inside.

    Only the official sites and Klook are authorised sellers. Anything else is a reseller adding a margin, at best.

    FAQ

    Are they worth ¥3,600–5,600?
    For a first visit, most people say yes — including people who went in sceptical about “digital art.” For a second visit to the same venue, opinions cool considerably. If you have one teamLab in you, make it count.

    Can I do both in one day?
    Physically yes — they’re about 40 minutes apart by train. But it’s a lot of dark rooms and infinite mirrors for one nervous system, and you’ll stop noticing things. Split them across two days if you can.

    How crowded is it really?
    Planets had 2.5 million visitors in 2025, Borderless 1.7 million. Assume crowds at any midday weekend slot. The first slot of the day is the single most effective fix.

    Is the photography as good as the photos suggest?
    Mostly. Phones handle these rooms surprisingly well, because the art is the light source. Bring a lens cloth for Planets — humidity and spray are real.

    Will Planets close?
    It’s confirmed to run through the end of 2027. It has been extended several times from an original 2020 closing date, so treat closing announcements with some scepticism — but don’t count on another reprieve either.

    The bottom line

    Planets for the body, Borderless for the wander. If someone forced us to pick one for a first-time visitor with a packed Tokyo itinerary: Planets — it’s shorter, it’s easier to fit in, and walking barefoot through a river of digital koi is the thing you’ll actually describe to people back home.


    Prices and hours as of August 2026, and both venues use dynamic pricing — confirm on the official site for your date. Corrections via the contact page. Some links here are paid affiliate links.
    Book before you forget

    Weekend slots at both museums vanish weeks ahead. Klook is an authorised seller for both and shows what is left in one place.

    Check teamLab availability →

  • Uogashiya, Shimbashi: Sushi and Ramen at One Tiny Counter, From 7am

    Uogashiya, Shimbashi: Sushi and Ramen at One Tiny Counter, From 7am

    The Call: if you’re anywhere near Shimbashi or Ginza — especially at an hour when nothing else sounds right — go. This is the rare place we’d finish a night at, and start a morning at.

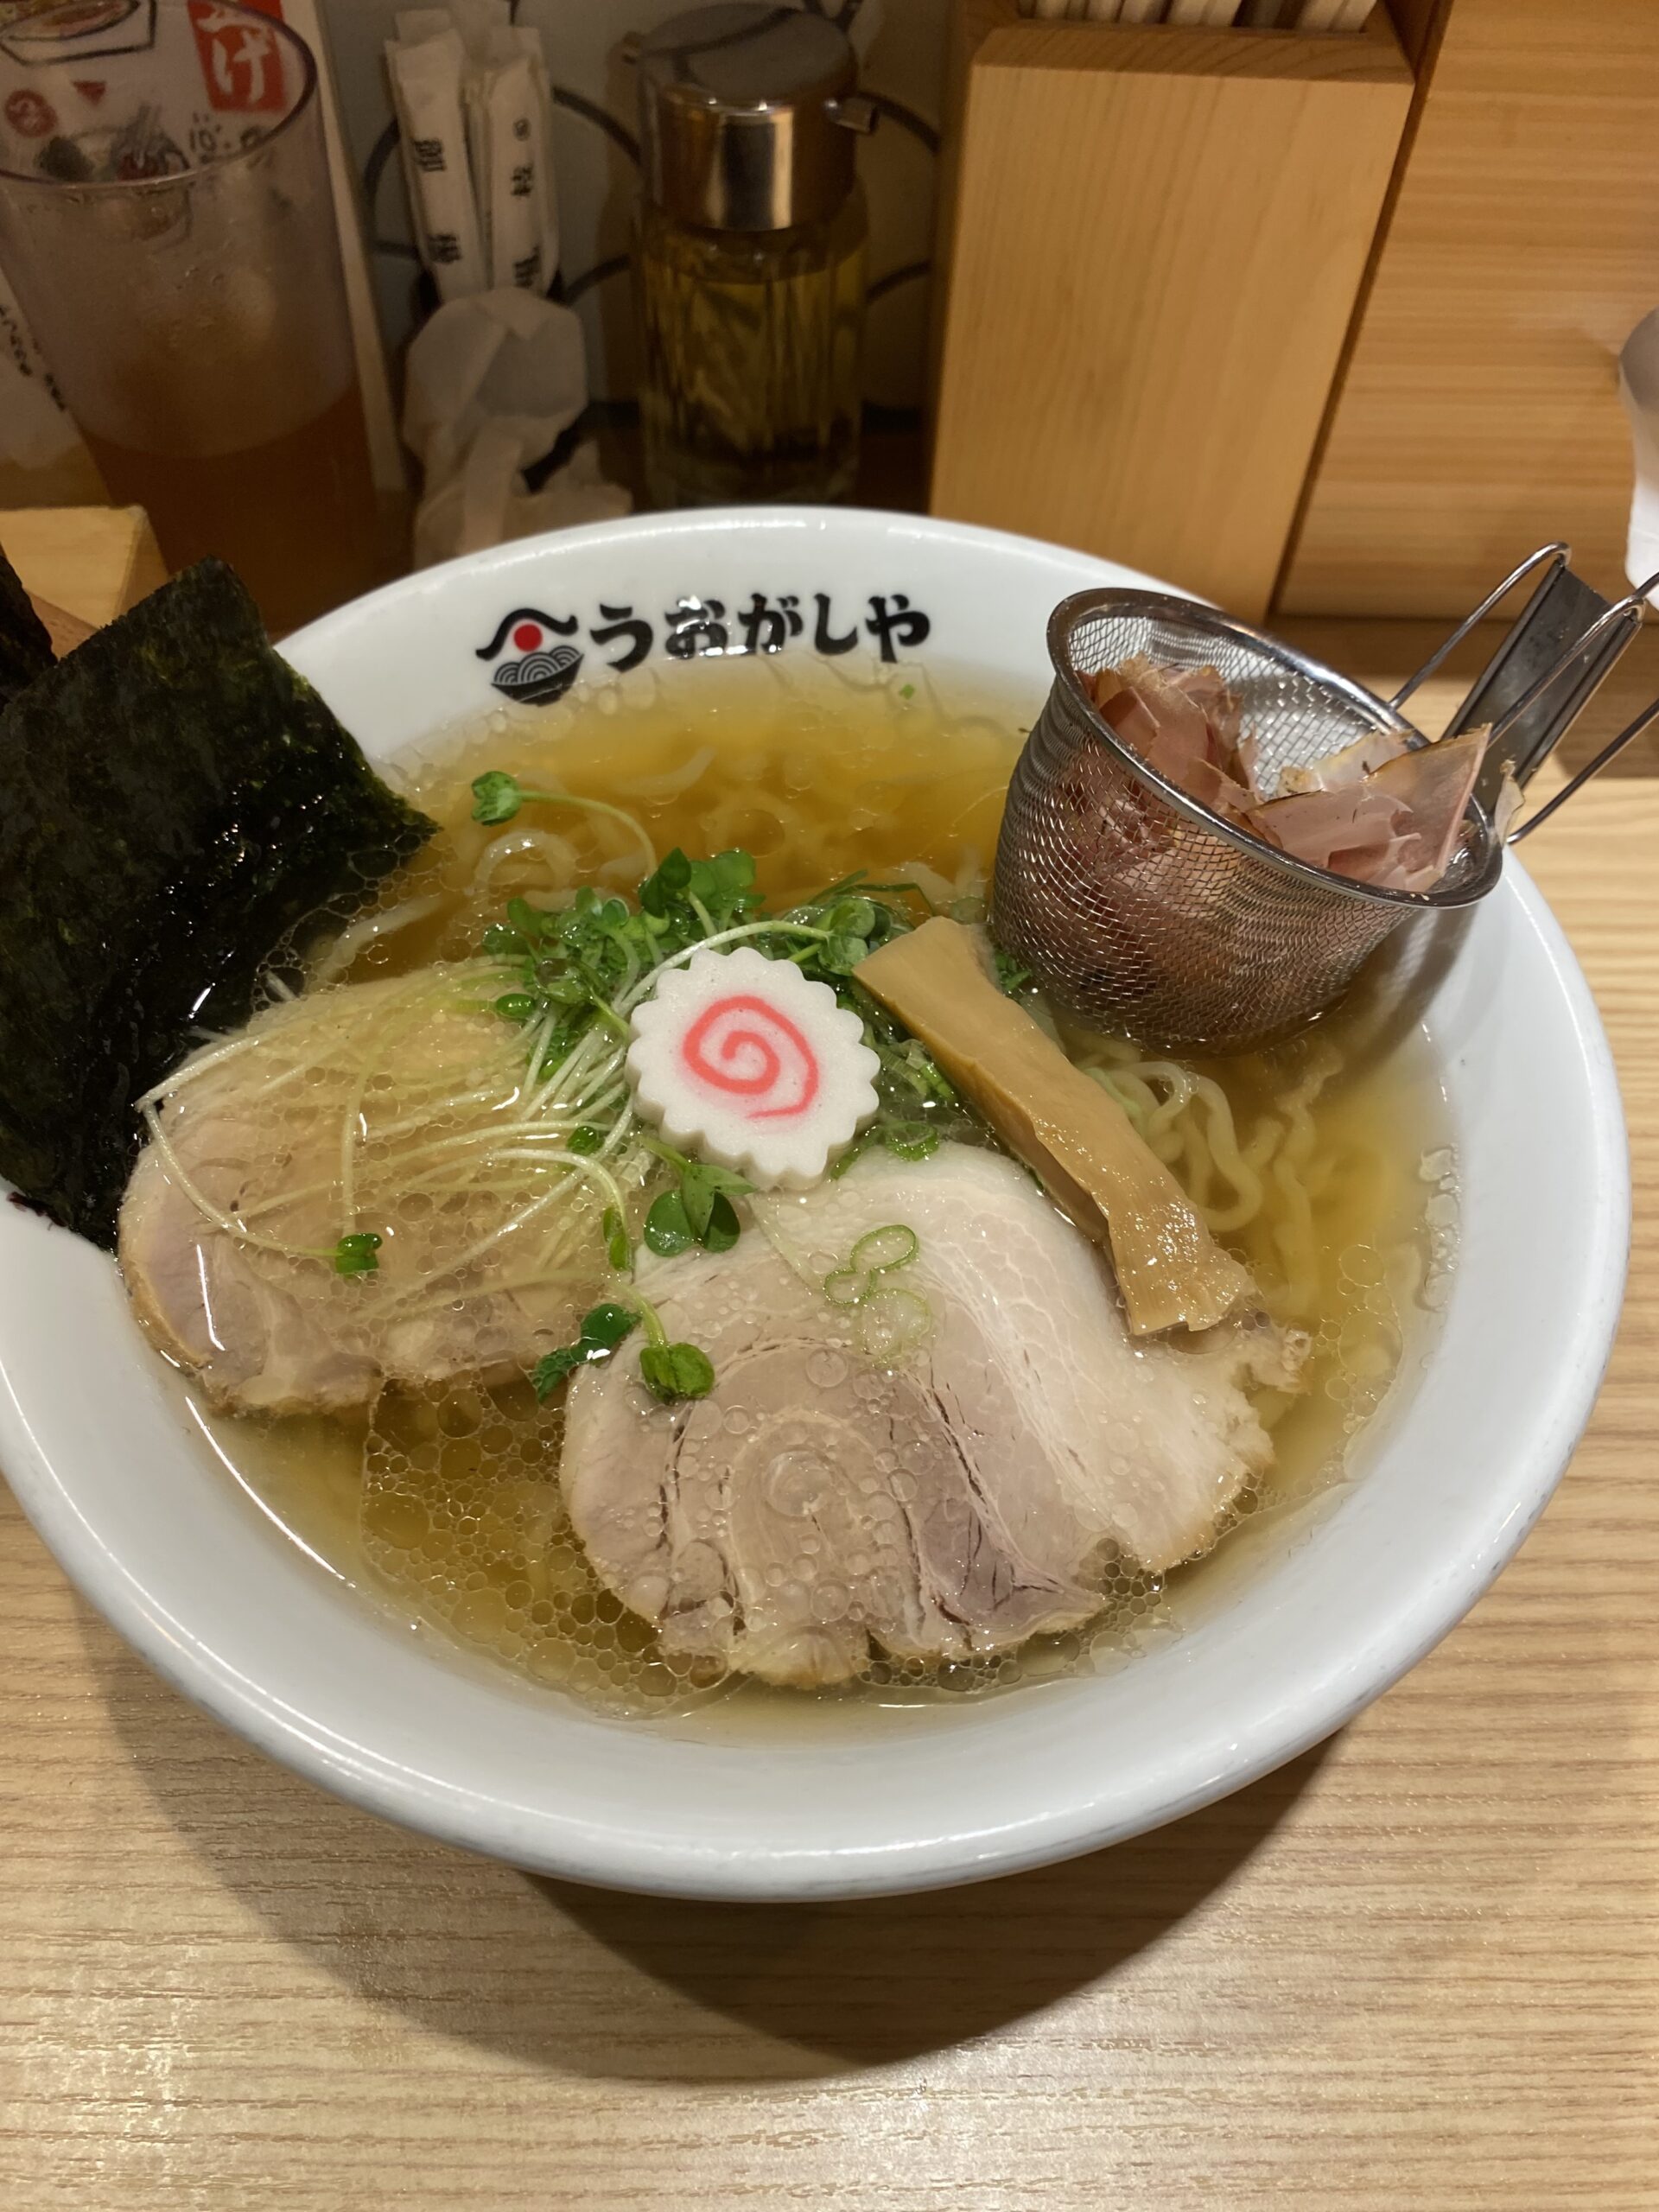
    Oi-gatsuo ramen at Uogashiya Shimbashi: clear golden broth, two kinds of chashu, naruto, nori, and a metal strainer basket of katsuobushi steeping in the bowl
    Our bowl. Note the metal basket on the right — that’s the whole trick.

    What is this place

    Uogashiya (うおがしや) is a 12-seat counter in Shimbashi, Tokyo’s salaryman heartland one stop from Ginza, that does two things at once: proper red-vinegar sushi with fish from the wholesale markets, and seafood-broth ramen. Separately, nothing unusual. Together, at one tiny counter, from 7 in the morning until 5 the next morning — that’s a Tokyo cheat code.

    Sushi-and-ramen sets exist because this is exactly how the neighborhood wants to eat: a few impeccable pieces of nigiri, then a hot bowl to finish. You can get the set for a four-digit bill that would barely buy you a starter one station over in Ginza.

    The bowl with a tea infuser of smoked bonito

    We ordered the oi-gatsuo ramen (追いかつお — “extra bonito”) with the sushi set. It arrives looking like the photo above: a clear, golden, dashi-forward broth — and a small metal strainer basket parked in the bowl, packed with katsuobushi shavings.

    That basket is the point. You steep it like tea. Leave it in, and the smoked-bonito depth keeps building sip by sip; the broth you finish is noticeably richer than the broth you started. It’s the kind of one-more-turn engineering Japanese food does quietly, without a single word of explanation on the menu.

    And here’s the confession that sells it: I’m Japanese. I’ve lived here my whole life, eaten a thousand bowls of ramen — and this was the first time I ever ate one while steeping my own bonito flakes. When a place can surprise a local at their own national dish, that’s not a gimmick. That’s a yorimichi.

    The eating notes from our visit: the umami is concentrated but the broth stays light — you finish satisfied without the heavy-ramen regret. Two styles of chashu, textbook naruto, and the dashi doing all the actual talking. If your ramen education so far has been tonkotsu heaviness, this is the other school: the one locals crave after a night of drinking, precisely because it doesn’t fight you.

    When to use it (this is the real value)

    • Jet-lag breakfast: open at 7:00. You’re wide awake at 6am on day two, hotel breakfast is ¥3,800, and here is sushi and a hot bowl a short walk from the Yamanote line. This is the move
    • The after-drinks finisher: Shimbashi is where Tokyo’s office workers drink, and a light seafood broth at 1am is the local-approved landing. Our honest verdict from the visit: if we’re drinking nearby, we’re absolutely coming back — that’s the whole review, really
    • The “I can’t choose between sushi and ramen” solver: and this is rarer than it sounds. A place doing both properly barely exists in Japan either — Japanese diners treat this combination as a novelty too. It is not a tourist convenience, it is a genuinely unusual shop

    The other reason to send visitors here

    There is a specific fear that stops people from ever eating sushi properly in Japan, and nobody says it out loud: the counter is intimidating. You have heard about the stern itamae who watches how you eat, the unspoken rules, the sense that ordering wrong is a small public failure. Whether or not that shop exists, the fear of it is real, and it sends a lot of visitors to a conveyor belt instead.

    That is not what happens here. There is no one behind the counter waiting to judge your soy sauce technique. It is a Shimbashi shop for people on their way somewhere, at whatever hour they turn up — the register at 7am is the same as the register at midnight. You come in, you sit, you eat, you go.

    That approachability is not a lesser version of a sushi counter. For a first-time visitor it is the whole point: you get red-vinegar sushi and a proper bowl of ramen in the same sitting, in a room where nobody minds how you do it.

    Skip it if…

    • …you’re a group of five with luggage. Twelve counter seats mean this is a solo/duo spot — check our hands-free trick and come back light
    • …you want a leisurely hour. Counter ramen culture runs on a satisfying in-and-out rhythm
    • …you only rate ramen by richness. This bowl argues the opposite case — come willing to be argued with

    Practical bits

    Where Shimbashi, Minato-ku — a few minutes from Shimbashi Station (JR Yamanote / Ginza line), one stop from Ginza
    Hours 7:00–5:00 next morning (confirm current hours before a special trip)
    Seats ~12, counter only
    Budget Ramen alone: roughly ¥1,000-and-something; with a sushi set, plan on a bit more — still Ginza-adjacent theft
    Cash? Bring some just in case (the cash rules)

    The Local Test

    Passes effortlessly. This is not a place built for tourists — it’s built for the Shimbashi rhythm: market fish in the morning, office lunches at noon, and the gentle salvation of dashi at closing time. You’ll likely be the only visitor at the counter, which is exactly the point of a yorimichi.


    Based on our own visit, August 2026 (yes, we paid). Hours and menus change — check before traveling far. More one-street-off spots coming in Detour Eats.

  • Tokyo Day Trips, Decided: Hakone vs Nikko vs Kamakura (2026)

    Tokyo Day Trips, Decided: Hakone vs Nikko vs Kamakura (2026)

    The short answer: only have energy for one? Kamakura. Chasing the “real Japan” postcard? Nikko. Want onsen steam and a shot at Mt. Fuji? Hakone — but it’s the most expensive and the most weather-dependent of the three.

    Every Tokyo itinerary has a “day trip?” slot, and everyone asks the same three names. They’re all good. They’re also completely different trips wearing the same label — and 2026 fare hikes changed the math on two of them. Let’s decide properly.

    Three day trips, one honest picture Hakone ~90 min ・ onsen & Fuji views day cost w/ pass: ~¥9,000+ Nikko ~110 min ・ shrines & nature round trip: ~¥6,300–6,700 TOKYO Kamakura ~55 min ・ temples & sea ・ ~¥2,900 all-in Tired? → Kamakura wins.
    Times from central Tokyo; costs assume 2026 fares (several rose this year).

    If you would rather not plan it

    Guided day tours to all three leave central Tokyo each morning with the train logistics handled — the sensible option for Nikko in particular, where two railway companies share the route.

    See Tokyo day trips →

    Kamakura: the effortless one

    ~55 min from Tokyo Station (¥1,040 on the JR Yokosuka line), no reservations, no planning. Great Buddha, temple-hopping, the Enoden tram along the sea (¥800 day pass), surfers at dusk. It’s the day trip that behaves like a neighborhood stroll — which is exactly why locals do it on a whim.

    Skip it if… you hate crowds and can only go on a weekend — it’s Tokyo’s favorite escape for a reason. Go on a weekday, arrive before 10am.

    Local Test: this is where Tokyo people actually take visiting friends first. Low stakes, high hit rate.

    Nikko: the grand one

    ~110 min from Asakusa on the Tobu limited express (~¥3,050–3,250 one way, reserved). Toshogu Shrine is the most spectacular religious complex in eastern Japan, and the lake-and-waterfall upland behind it feels like another prefecture. This is the “I can’t believe this is a day trip” option.

    Skip it if… you’re already templed-out from Kyoto, or you’re visiting in deep winter without warm layers — it’s mountain-cold up there.

    Know: the old paper day-passes were discontinued in 2025; ticketing is app-based now (or the tourist-only NIKKO PASS at ¥8,000/4 days if you’re staying over). Old blogs will confidently mislead you here.

    Hakone: the scenic circus

    ~90 min from Shinjuku on the Odakyu Romancecar (~¥2,470, reserved). The famous loop: mountain railway → cable car → ropeway over volcanic steam → “pirate ship” across the lake, with onsen and museums scattered along it. On a clear day, Fuji photobombs everything.

    The money part, honestly: the Hakone Free Pass is now ¥7,100 (2 days, from Shinjuku — it jumped from ¥6,100 in late 2025), plus the Romancecar surcharge. A full Hakone day realistically runs ¥9,000+. Worth it if you ride the whole loop; poor value if you just want one onsen and lunch.

    Skip it if… the forecast is cloudy (no Fuji, foggy ropeway = you paid ¥9,000 for mist), or you dislike queueing — the loop bottlenecks on weekends.

    The comparison, side by side

    Kamakura Nikko Hakone
    Door-to-door ~55 min ~110 min ~90 min
    Realistic day cost (transport+passes) ~¥2,900 ~¥6,500 + entries ~¥9,000+
    Planning needed None Reserve express seats Reserve Romancecar; check weather
    Weather risk Low Medium High (it’s all views)
    Best for Easy charm, sea air Grandeur, nature Onsen, Fuji, variety

    FAQ

    Can I do two of these in one trip?
    Yes, comfortably — most people pair Kamakura (light day) with either Nikko or Hakone (big day). Doing all three usually means you needed another Tokyo day instead.

    Hakone or Fuji Five Lakes for seeing Mt. Fuji?
    For a guaranteed attempt at Fuji views, Kawaguchiko is more direct — but it’s a longer, bus-heavy day. Hakone gives you a full day of things to do even when Fuji hides.

    Is the JR Pass useful for these?
    Mostly no — Kamakura is cheap anyway, and Nikko/Hakone run on private railways the pass doesn’t cover. (The pass math lives here.)

    Should I stay overnight instead?
    Hakone, yes if you can — an onsen ryokan night is a different (better) experience than the day-trip sprint. Kamakura and Nikko day-trip cleanly.

    The bottom line

    Kamakura when you want ease, Nikko when you want awe, Hakone when you want the full scenic production and the weather agrees. And if you’re reading this the night before, exhausted, at 11pm in a Shinjuku hotel: Kamakura. Trust us.

    If you’d rather not think about trains at all: guided day-tour versions of all three — bus, guide, lunch handled — are on Klook. Worth considering for Nikko especially, where the two-company train situation demands the most attention.

    Book a day trip

    Guided day tours to Hakone, Nikko and Kamakura leave central Tokyo each morning, with the train logistics handled.

    See Tokyo day trips →


    Fares as of August 2026 — Odakyu, Tobu and JR East all revised prices within the last year, so treat older guides’ numbers with suspicion. Corrections via the contact page. Some links here are paid affiliate links.
  • Narita vs Haneda: Getting Into Tokyo, Decided (2026 Prices)

    Narita vs Haneda: Getting Into Tokyo, Decided (2026 Prices)

    The short answer: from Haneda, just take the Keikyu line (¥330, 15 minutes to Shinagawa) and stop overthinking. From Narita, pick by budget: the ¥1,500 TYO-NRT bus if you’re patient, the Skyliner if you’re not, the N’EX round-trip ticket if your hotel is on the Yamanote west side.

    Which airport you land at was decided months ago by your airline. What’s still yours to decide is the next 60–100 minutes — and this is one of those choices where the “premium” option is sometimes worse. Here’s the whole picture, with 2026 prices (several went up this year; old blog posts are wrong).

    Landing at Haneda: you’ve already won

    Haneda is functionally in Tokyo. Two rail options, both cheap, both fast:

    Route Price Time Best when
    Keikyu line → Shinagawa ¥330 ~15 min Almost always. Shinagawa connects to the Yamanote loop and the Shinkansen
    Monorail → Hamamatsucho ¥520 ~18 min Hotels on the east/south Yamanote; great bay views as a bonus
    Limousine bus → Shinjuku ¥1,400 40–60 min Mountains of luggage, kids asleep, hotel is a bus stop

    With an IC card (sorted here) you just tap in — no ticket buying, no reservations. This is why we rate Shinagawa-side hotels for Haneda arrivals.

    Landing at Narita: pick your fighter

    Narita is 60–80km out. Four real options:

    Route Price Time Best when
    AIRPORT BUS TYO-NRT → Tokyo Sta./Ginza ¥1,500 ~65–90 min Best yen-per-km in Japan. No reservation, just queue. Late-night runs cost ¥3,000
    Skyliner → Ueno/Nippori ¥2,580 (¥2,310 online) 41 min Fastest into the city. Hotels on the north/east side (Ueno, Asakusa). Buy online, save ¥270
    N’EX → Tokyo/Shinagawa/Shibuya/Shinjuku ¥3,140–3,330 one-way — but ¥5,200 round trip (tourist ticket, 14 days) 60–90 min Hotels on the west side (Shinjuku/Shibuya) and flying out of Narita too — the round-trip deal is the quiet winner
    Keisei Access Express ~¥1,310 ~60 min to Ueno Budget rail without bus queues; direct to Asakusa too

    The honest matrix: Asakusa/Ueno hotel → Skyliner or Access Express. Shinjuku/Shibuya hotel → N’EX round-trip. Tokyo Station/Ginza → the ¥1,500 bus and pocket the difference. Traveling at 5am or after midnight → the late-night bus is basically your only friend.

    If it’s late, you’re jetlagged, or there are four of you

    A pre-booked private transfer meets you at arrivals with your name on a sign and costs about the same as a taxi — roughly ¥20,000–30,000 from Narita, ¥8,000–12,000 from Haneda, for the whole car. For families and midnight landings it’s the sane option.

    Book a private transfer →

    Skyliner and N’EX tickets can also be pre-bought on Klook, which saves the ticket-machine queue after a long flight.

    Three mistakes we watch people make weekly

    1. Buying N’EX one-way at ¥3,330 when the ¥5,200 round-trip exists. If you arrive and depart via Narita within 14 days, this is a 22% discount hiding in plain sight
    2. Taking a taxi from Narita. ¥25,000–30,000. Unless there are five of you with a tuba, no
    3. Dragging three suitcases onto the Skyliner at rush hour. For heavy-luggage arrivals, consider the bus — or better, send the bags ahead from the airport counter (same-day to central Tokyo if you land before ~11:00) and ride any train like a free human being

    FAQ

    Is Haneda worth paying more for at booking time?
    Usually yes — ¥30–50 more per ticket buys you back 60+ minutes each way and cheaper ground transport. For short trips it’s the single best upgrade in Japan travel.

    Do I need to reserve airport trains?
    Skyliner and N’EX: yes, seats are reserved (buy at the counter/machine/online on arrival — easy). Keikyu, monorail, Access Express: no, tap and board.

    What about the “Narita Express is covered by the JR Pass” trick?
    True — if you already have a JR Pass that makes sense. Never buy the pass just for the airport run.

    The bottom line

    Haneda: tap your IC card, ride Keikyu, done. Narita: ¥1,500 bus for value, Skyliner for speed to the east side, N’EX round-trip for the west side. Put the saved money where it belongs — your first proper bowl of ramen.


    Prices as of August 2026 (several operators raised fares in 2025–2026; older guides quote stale numbers). Corrections via the contact page. Some links here are paid affiliate links.
    Landing late, or with a family

    A pre-booked private transfer meets you at arrivals with your name on a sign, for roughly what a taxi costs — and you do not queue for a ticket machine at midnight.

    Book an airport transfer →

  • What to Actually Buy at a Japanese Drugstore (2026 Tax-Free Edition)

    What to Actually Buy at a Japanese Drugstore (2026 Tax-Free Edition)

    The short answer: skip the airport souvenir shops. A Japanese drugstore is the best one-stop souvenir and self-care shop in the country — and if you spend ¥5,000+ in one visit, it’s tax-free.

    Matsumoto Kiyoshi, Welcia, Sugi, Daikoku — the glowing signs are everywhere, and inside is a very specific kind of paradise: products engineered with the full obsessiveness of Japanese consumer culture, at everyday prices. This is a category we know unreasonably well (our Japanese sister site reviews household goods for a living), so here’s the local’s shopping list.

    Free coupon, worth having first

    Before any of this: Don Quijote issues a tourist coupon worth 5% off over ¥10,000 or 7% over ¥30,000, stacked on top of tax-free. It costs nothing and takes thirty seconds.

    Get the Don Quijote coupon →

    ⚠️ Big change coming: tax-free rules switch on November 1, 2026

    Right now (through October 31, 2026): show your passport, spend ¥5,000+ tax-free at the register, consumables get sealed in a bag you’re not supposed to open in Japan.

    We wrote up exactly what changes on 1 November and what to do at the airport.

    From November 1, 2026: Japan switches to a refund system. You’ll pay the 10% tax at the register, then claim it back at customs when you leave (within 90 days). Upside: no more sealed bags — you can use your sheet masks the same night. Downside: one more airport queue, so leave time for it. If you’re traveling around the switch date, don’t panic when your favorite blogger’s instructions don’t match the register.

    The list: what’s actually worth your suitcase space

    The universally loved

    • Steam eye masks (MegRhythm/めぐりズム) — self-warming masks that make a 13-hour flight home survivable. The #1 “why don’t we have these” product
    • Biore UV Aqua Rich sunscreen — the watery-light texture that made Japanese sunscreen a global cult. Cheaper here than anywhere online
    • Rohto eye drops — the cooling-level scale (mild to “wasabi for your eyeballs”) is an experience in itself
    • Salonpas patches — the pain-relief patches that outsell everything, in sizes from fingertip to shoulder blade
    • Kyusoku Jikan (休足時間) cooling leg sheets — stick on your calves after a 25,000-step Kyoto day. Travelers’ legal doping

    The connoisseur picks

    • Ryukakusan throat drops (龍角散) — herbal, oddly addictive, in every local’s winter pocket
    • ROIHI-TSUBOKO (ロイヒつぼ膏) — the little round warming patches your grandmother would love; a top gift for older relatives
    • CANMAKE / CEZANNE cosmetics — ¥600–1,500 makeup with quality that embarrasses brands charging five times more
    • Quick washes & sheet masks by the box (Lululun, Kose Clear Turn) — hotel-night ritual, suitcase-friendly gifts

    Approach with knowledge

    • Medicines (painkillers, cold tablets) — beloved locally, but check your home country’s import rules; some common Japanese ingredients are restricted abroad. When in doubt, stick to patches and drops
    • KALDI-style snack aisles — drugstores sell snacks and drinks at prices konbini can’t touch. Matcha KitKats here, not at the airport (roughly half price)

    How to shop it like a local

    1. Consolidate: tax-free needs ¥5,000+ (pre-tax) at one store, same day. One big Welcia run beats four small ones
    2. Look for the tax-free counter sign — big urban branches have dedicated counters (and often multilingual staff); tiny neighborhood shops may not offer it at all
    3. Prices vary more than you think — the same eye mask box can differ ¥300 between chains on the same street. Locals comparison-shop; feel free to be one of us
    4. Pay smart: cards and IC cards work fine at all major chains (more on money here)
    5. Read the label with your phone: Google Lens or the Translate app’s camera mode handles Japanese packaging surprisingly well — that’s how you tell the “cooling” eye mask from the “warming” one. It needs data, which is one more reason to have an eSIM sorted before you shop
    6. Don’t do this with a suitcase: drugstore aisles are narrow and the good branches are busy. If it’s checkout day, park the bag firstbooked storage runs about ¥600 a day
    7. Go at night: many urban drugstores run late (some 24h) — perfect jet-lag activity

    Free coupon, worth having

    Don Quijote (Donki) issues a tourist coupon: show it on your phone at the register for 5% off over ¥10,000 or 7% off over ¥30,000, stacked on top of tax-free. It costs nothing. Donki is the late-night, everything-under-one-roof option — less curated than Matsukiyo, but the coupon tips the maths for a big haul.

    Get the Don Quijote coupon →

    FAQ

    Drugstore vs Don Quijote?
    Donki is the theme park (chaotic, fun, everything); drugstores are the supermarket (calmer, often cheaper for health/beauty staples). Do Donki once for the experience, drugstores for the actual haul.

    Can I open the sealed tax-free bag?
    Until Oct 31, 2026: not in Japan (customs can charge you the tax if the seal’s broken). From Nov 1, 2026: no more bags — use freely, refund at departure.

    Are these products available at home online?
    Often yes at 2–3× the price, sometimes as questionable parallel imports. Buying at source is the whole point.

    The bottom line

    Budget one empty duffel and one hour in a big-city drugstore near the end of your trip. Hit the ¥5,000 tax-free line without trying, fill it with eye masks and sunscreen and patches, and you’ll be the most popular person home — for about the price of two airport gift boxes.

    Going deeper: which skincare is actually worth the suitcase space · the medicine guide, including what you cannot legally take home · Don Quijote, and the free coupon · what is worth buying at the airport.


    Tax-free rules verified August 2026; the November 2026 refund transition is legislated but operational details may evolve — check signage in store. Nothing here is medical advice; check your country’s import rules for medicines. Corrections via the contact page. Some links here are paid affiliate links.
  • How Much Cash Do You Actually Need in Japan? (2026)

    How Much Cash Do You Actually Need in Japan? (2026)

    The short answer: bring your cards, plan to pay 80% of your trip with them, and carry about ¥10,000 (~$67) a day in cash for everything else — topping up from 7-Eleven ATMs as you go.

    “Is Japan still a cash country?” is the wrong question in 2026. Japan is now a card country with cash pockets — over half of consumer spending is cashless — and the trick is simply knowing where those pockets are, because they happen to include some of the best parts of your trip.

    Japan 2026: card country, cash pockets CARD / PHONE WORKS ✓ Convenience stores ✓ Chain restaurants & cafes ✓ Department stores, malls ✓ Hotels, big-city taxis ✓ Trains (IC card / tap) ✓ Drugstores, Don Quijote CASH STILL RULES ¥ Ramen ticket machines ¥ Small family restaurants ¥ Shrines & temples ¥ Markets, festivals, stalls ¥ Rural buses & taxis ¥ Old coin lockers Plan: pay the left column by card — carry ¥10,000/day for the right
    Over half of Japanese consumer spending is now cashless — but the memorable stuff often isn’t.

    Where your card just works

    Convenience stores, chain restaurants, department stores, hotels, city taxis, drugstores: tap and go, including Apple Pay and Google Pay. Trains take your Suica (we settled the IC card question here) — and that same Suica balance pays at konbini and vending machines too. In central Tokyo you could genuinely go days without touching a coin.

    Cash is not a limitation here. It is an admission ticket

    Most guides treat Japan’s remaining cash pockets as an inconvenience to be routed around. That is the wrong way to think about it, and it will cost you the better half of the trip.

    There is a correlation that every resident knows and no guidebook states plainly: the better the ramen, the less likely the card reader. The same is true of yakitori. A counter with six stools, one man, forty years of the same sauce, and a ticket machine by the door that takes coins and nothing else — that is not a shop that has failed to modernise. That is a shop that has decided its energy goes somewhere else. The card reader is often the tell that a place is aimed at you rather than at the neighbourhood.

    So the cash in your pocket is not a workaround. It is what gets you through those doors.

    And then there is the part that only works with coins

    Japan still runs on a layer of small analogue machines that no app has replaced, and the physical act is the whole appeal.

    Gachapon. The capsule toy machines that fill an entire wall in Akihabara, and sit in threes outside supermarkets everywhere else. You put the coin in. You turn the handle with your hand, and it resists slightly. Something falls, heavily, into the tray. You open a plastic capsule to find out which of twelve tiny animals you got, and it is the wrong one.

    None of that survives being a tap on a screen. The coin is not the payment method — it is the mechanism. That is why the machines have not gone cashless and why nobody wants them to.

    UFO catchers. Same principle, more expensive lesson. The claw is loose on purpose. You knew that and you played anyway.

    Then the rest of it: festival stalls where a man is grilling squid and does not want to discuss payment technology. Rural buses where you drop coins into a box beside the driver. The tiny standing bar under the railway arches. Old-format ticket machines. Coin lockers in stations that have not been upgraded.

    Running out of cash on a Saturday in a market town is a self-inflicted wound, and the injury is not financial. It is that you walked past the good place because you could not pay in it.

    Practical version: keep ¥10,000 in notes and a genuine handful of ¥100 coins. Not for emergencies. For the machines.

    Shrines and temples are more mixed than most guides admit. The large ones have quietly gone cashless in places: Shimogamo Jinja in Kyoto has taken cards and e-money at its amulet counter since 2019 — Visa, Mastercard, nanaco, Rakuten Edy, even PASMO — and Kanda Myojin in Tokyo accepts a phone payment for the offering box itself. Visitors arriving without coins were a large part of the reason.

    But adoption is far slower here than in ordinary shops, and it is unpredictable: a famous shrine may take your card for an omamori while the small one on the hill behind it takes nothing. Carry coins anyway. Having a ¥500 coin in your pocket also means you can put something in the offering box without hunting for a terminal, which is rather the point of the gesture.

    The ATM playbook (this is the important part)

    Here is the fact that surprises people, and it is the reverse of what you would expect: in Japan, the bank will not give you money and the convenience store will.

    Walk into a branch of one of the big Japanese banks — MUFG, SMBC, Mizuho — put a foreign card into the machine, and it will most likely decline it. Those ATMs are built for domestic cards. Meanwhile the cash machine tucked between the magazines and the hot food counter at 7-Eleven accepts practically every card on earth, in twelve languages, at four in the morning.

    So: do not look for a bank. Look for a convenience store. There is one closer than the bank anyway.

    Where Cards accepted Their fee Per withdrawal
    7-Eleven (Seven Bank)
    Your default
    Visa, Mastercard, Maestro, Cirrus, PLUS, Amex, JCB, UnionPay and most international debit networks Mastercard, Maestro, Cirrus: none. Visa: ¥110 under ¥10,000, ¥220 above. Amex: ¥220 Up to ¥100,000 with a chip card; ¥30,000 if your card is magnetic stripe only
    Lawson (Lawson Bank) Visa, Mastercard, Maestro, Cirrus, PLUS, UnionPay Flat ¥75 — the cheapest counter fee in the country Around ¥50,000
    Japan Post Bank Major networks ¥220 on some foreign cards Around ¥50,000
    Japanese bank branches Often none Do not rely on these

    Two practical notes. If your card is a Mastercard, 7-Eleven charges you nothing at all, which makes the decision easy. And if you are carrying a card with no chip — still common on some older US accounts — your ceiling drops to ¥30,000 a go, so plan more trips.

    The fee that actually costs you money is not the Japanese one. It is your own bank’s overseas withdrawal charge, which is frequently a percentage rather than a flat amount. Check it before you fly, and then withdraw in large chunks rather than small ones — ¥50,000 at a time rather than ¥10,000 five times. Seven Bank’s ATMs are open 24 hours, so there is no reason to run to empty.

    Skip the airport currency counters beyond a few thousand yen of survival money, and do not bring a brick of cash from home to exchange. The rate at a convenience store ATM is the interbank rate your card issuer uses; the rate at a bureau de change is not.

    So how much cash, actually?

    • Baseline: ¥10,000 per person per day covers ramen lunches, shrine visits, snacks, a market splurge, and the odd cash-only izakaya — most days you’ll spend less and roll it over
    • Budget travelers paying big items by card get away with ¥5,000–8,000/day
    • Keep a ¥10,000–20,000 reserve note folded somewhere separate — for the rural day, the festival night, or the taxi where the card reader is “broken” (it happens)
    • Coins matter: Japan will bury you in them. Feed ¥100s to lockers and vending machines, and dump the rest on your Suica or a konbini payment before flying home

    FAQ

    Should I exchange money before arriving?
    Only pocket money for the first hours. The 7-Eleven ATM at your arrival airport gives a better effective rate than nearly any exchange counter.

    Is tipping a thing?
    No. Not taxis, not restaurants, not hotels. Excellent service is included; leaving coins mostly causes someone to chase you down the street to return them.

    Card got declined at a small shop?
    Not personal — minimum amounts and cash-only policies survive at small businesses. That’s what your ¥10,000 is for.

    Can I rely on just my phone?
    In Tokyo, mostly yes. Nationwide, no. Phone + physical card + daily cash is the redundancy that never fails.

    What about traveler’s checks?
    It’s 2026. No.

    The bottom line

    Cards for the predictable, cash for the memorable. ¥10,000 a day in your pocket, ¥50,000+ per ATM visit, always in yen, never tipping — that’s the entire system. The goal isn’t to avoid cash; it’s to never let a ticket machine stand between you and the best bowl of your trip.

    Related: how tax-free shopping changes on 1 November 2026 (you’ll pay full price at the till and be refunded later, which affects how much card headroom you need), and what’s worth buying at a drugstore.


    Cashless share based on METI’s 2026 release (58% of consumer payments in 2025, under the revised domestic metric). ATM specs from Seven Bank / Japan Post official pages, August 2026. Corrections via the contact page.

  • Luggage Forwarding in Japan: How Locals Travel Hands-Free for ¥3,160

    Luggage Forwarding in Japan: How Locals Travel Hands-Free for ¥3,160

    The short answer: hand your suitcase to your hotel’s front desk tonight, and it will be waiting at your next hotel tomorrow evening — for about ¥3,160 ($21) per big bag. This is the single most underrated travel system in Japan, locals use it constantly, and most visitors discover it on their last day. Let’s fix that.

    How it works: Tokyo → Kyoto, hands-free Evening, Day 0 Hand suitcase to Tokyo hotel front desk Day 1 You ride the Shinkansen with just a daypack Evening, Day 1 Suitcase waiting at your Kyoto hotel Big suitcase, one way: about ¥3,160 (~$21)
    Next-day delivery covers almost all of Japan. Same-day exists only within cities and from airports.

    Why this beats dragging your bag onto the Shinkansen

    Japanese trains are luggage-hostile in a very polite way: oversized-baggage seats on the Tokaido Shinkansen must be reserved, station staircases appear out of nowhere, and rush-hour trains have no space for a 28-inch suitcase and your dignity. Meanwhile, the delivery network (takkyubin — you’ll see the Yamato black cat logo everywhere) moves boxes overnight with near-mythical reliability. Locals send suitcases ahead to airports, hotels, even ski resorts. The Local Test doesn’t get clearer than this.

    What it costs (as of Aug 2026)

    Prices below are Yamato’s standard Tokyo→Kyoto rates — the route most of you will use. Size = height + width + depth in cm.

    Size Fits Price approx USD
    100 Carry-on suitcase ¥1,650 ~$11
    120 Medium suitcase ¥2,170 ~$14.50
    140 Large suitcase ¥2,780 ~$18.50
    160 Big check-in suitcase ¥3,160 ~$21

    The rule nobody tells you: an unboxed suitcase is charged as size 160 even if it technically measures more — up to 200cm/30kg total. In practice, ¥3,160 is the ceiling for almost any suitcase you’d fly with. (Drop it at a Yamato counter or convenience store yourself and it’s ¥100 less, but the hotel desk is the easy way.)

    How to actually do it, step by step

    1. Ask your front desk: “Takkyubin to my next hotel, please.” Every hotel in Japan knows this drill
    2. Fill the slip with the next hotel’s name, address, phone, your name as booked, and your check-in date — hotels hold bags for arriving guests as a matter of routine
    3. Pay (cash is safest; many desks take cards) and keep the tracking slip
    4. Pack a one-night daypack: your bag leaves tonight and arrives tomorrow evening, so keep a change of clothes, chargers, and valuables with you

    Nobody tells you this: you can do it from a convenience store

    Every English guide sends you to the hotel front desk or a courier office. Both work. But the thing residents actually do, and that visitors almost never hear about, is walk into a 7-Eleven or FamilyMart and hand the bag over the counter.

    That is the whole trick. Those two chains are Yamato agents. The counter that sold you an onigiri at 2am will also send your suitcase to Kyoto.

    Why it matters more than it sounds:

    • They are open when nothing else is. Hotel desks close, courier offices shut at 19:00. A konbini does not. If you realise at 11pm that tomorrow involves three trains with a large case, you can fix it tonight
    • There is one on the way. You do not need to find the Yamato office. You need to find the shop you were already walking past
    • You can send a bag to the airport from one. Airport takkyubin is accepted at convenience stores, so your case can go to Narita or Haneda while you spend the last day unencumbered

    The limits, which are real

    • 160cm total (all three sides added) at FamilyMart. Some 7-Elevens go higher, but not all take over 180cm or 30kg. A standard large suitcase is fine; a bike box is not
    • 30kg maximum
    • Outbound only. You can send from a convenience store. You cannot collect there — that is a common and expensive misunderstanding
    • No chilled deliveries from konbini. If you bought something that needs Cool Takkyubin, you need a proper Yamato counter
    • Lawson is a different carrier, so the slip and the prices differ. Use 7-Eleven or FamilyMart if you want the Yamato service described here

    Doing it without Japanese

    The slip is in Japanese and the staff member may not speak English, but this is a very well-worn transaction and it survives having no shared language. What makes it work:

    1. Have the destination address in Japanese on your phone. This is the one thing that actually matters. Screenshot it from the hotel’s Japanese-language site, or ask your current hotel to write it out before you check out. An address in romaji will slow everything down
    2. Write your own name exactly as the booking, plus your check-in date. Hotels routinely hold bags for guests arriving later
    3. Point at the bag, say “takkyubin”. That word does all the work
    4. Pay at the register and keep the slip. It has the tracking number

    If the queue behind you is growing and the form is defeating you, the hotel front desk is still the easier option in daylight hours. The konbini is the answer for the other sixteen hours of the day.

    Timing rules that matter

    • Next-day is the standard, almost everywhere in Japan (Hokkaido, Okinawa and some regions take 2 days)
    • There is no same-day Tokyo→Kyoto. Same-day exists only within a city (Kyoto same-city: ¥2,860) and from airports
    • Airport shortcut: landing at Haneda? Drop bags at the Yamato counter before 11:00 and they reach central-Tokyo hotels the same evening (roughly ¥4,600 all-in for a big bag, including the airport counter fee). Narita’s cutoff is ~10:30. Landing later? It arrives next day — still better than hauling it through rush hour
    • Don’t send: passports, cash, valuables, or loose lithium batteries (power banks stay with you — same rule as flying)

    When NOT to bother

    Skip forwarding if you’re only moving between two hotels in the same city (just taxi it), if your bag is a carry-on you can genuinely carry, or if you check out tomorrow morning and land at your next city by noon — the bag won’t beat you there. This system shines on the classic multi-city route: Tokyo → Hakone/Kyoto → Osaka, where each transfer day becomes a free sightseeing day.

    FAQ

    Will the next hotel accept my bag before I check in?
    Yes — standard practice nationwide. Write your booking name and check-in date on the slip and it’ll be in your room or behind the desk when you arrive.

    When do I hand it over for next-day delivery?
    The evening before, or by early morning pickup (ask the desk for their cutoff — usually before ~9:00).

    Does my suitcase need a box?
    No. Suitcases travel naked with a tag. That’s normal here.

    Can I send bags to the airport for my flight home?
    Yes — allow an extra day, and Yamato/JAL ABC counters at the terminal hold them for pickup. Locals do this routinely.

    Is it safe?
    This is Japan’s everyday logistics backbone, with liability coverage up to ¥300,000 per item. Losing a bag is national-news rare.

    The bottom line

    ¥3,160 to turn a sweaty luggage-hauling day into a hands-free one is the best money-for-misery trade in Japanese travel. Book nothing, download nothing — just talk to your front desk tonight.

    Station-specific storage: Tokyo, Shinjuku, Shibuya, Asakusa & Ueno.

    If the bag just needs to disappear for the day rather than travel somewhere, that’s storage, not forwarding — we covered lockers, counters and booked storage in Tokyo separately.


    Rates are Yamato’s standard cash rates as of August 2026 (last revised Oct 2025) and vary slightly by route; verify at the desk. Corrections welcome via the contact page.