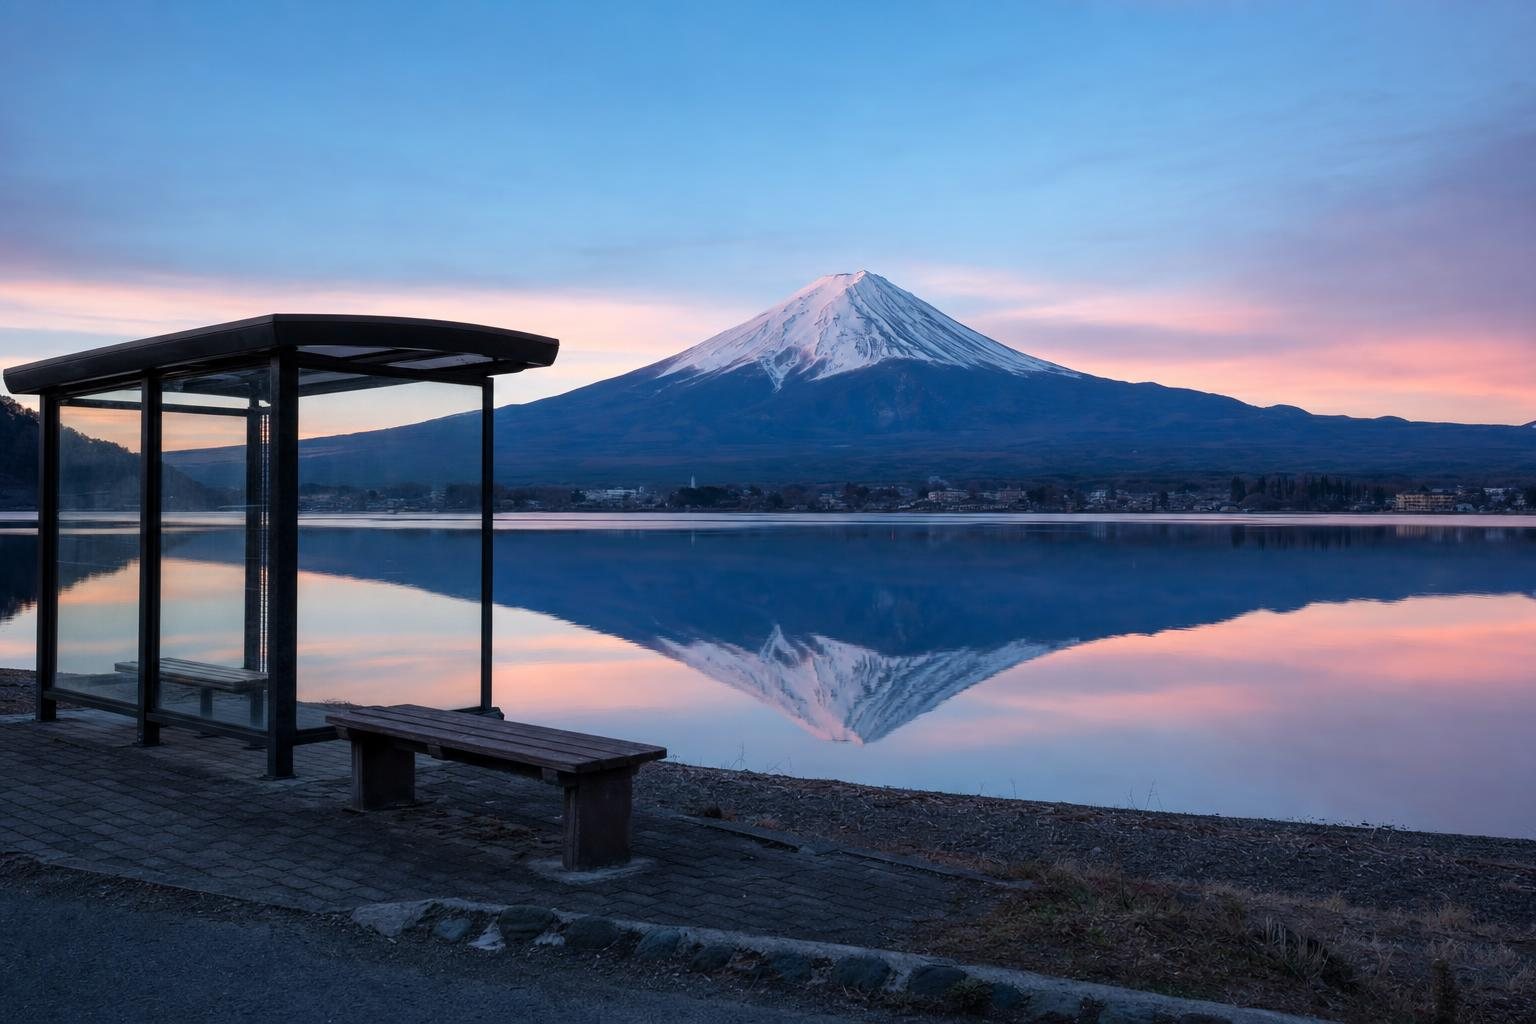
Category: Decisions

  • Mt. Fuji Day Trip from Tokyo: Tour or DIY? (2026)

    Mt. Fuji Day Trip from Tokyo: Tour or DIY? (2026)

    The honest version: this is one of the rare cases where the guided tour is both cheaper and better. Here’s the maths, and the two situations where DIY still wins.

    The call

    Take a guided coach tour if this is a one-day trip and you want to see more than one thing. Around ¥7,500–8,500 gets you transport, a guide, and three or four stops that are genuinely annoying to link by public transport. Doing the same day yourself costs more.

    Go DIY if you’re staying overnight in Kawaguchiko, if you’re travelling with kids who need to bail out at any moment, or if you want to chase the clear morning sky on your own schedule rather than a coach’s.

    And before anything else: Fuji is invisible more often than travel photos suggest. Summer is the worst season for it. Build a day you’d enjoy even if the mountain never appears — because there’s a real chance it won’t.

    What a day at Mt. Fuji actually costs per person, one adult, August 2026 DIY by bus ¥9,000 to ¥10,500 Highway bus both ways + local bus pass + ropeway, cruise, lunch Guided coach tour ¥7,500 to ¥8,500 Transport, guide, 3–4 stops, admissions included Lunch usually extra DIY by train ¥13,000 to ¥14,500 Fuji Excursion express Comfortable, reserved seat Sells out a month ahead The surprise: the guided tour is usually the cheapest way to do it properly.

    Why DIY costs more than you’d think

    The train fare isn’t the problem. The problem is that the good stuff around Lake Kawaguchi is spread out, and each piece has its own ticket.

    DIY, one adult, one day Cost
    Fuji Excursion limited express, Shinjuku→Kawaguchiko round trip ~¥8,300
    (or highway bus from Busta Shinjuku, round trip) ~¥4,400
    Kawaguchiko sightseeing bus pass (2-day) ¥1,500
    Mt. Fuji Panoramic Ropeway, round trip ¥1,000
    Lake Kawaguchi cruise ¥1,000
    Lunch (hōtō noodles, the local thing) ~¥1,500
    Total by train ~¥13,000–14,500
    Total by highway bus ~¥9,000–10,500

    Now compare a standard full-day coach tour from Tokyo: roughly ¥7,500–8,500, including transport, an English-speaking guide, and admissions to three or four stops — typically Arakurayama Sengen Park (the pagoda-and-Fuji photo), Oshino Hakkai spring village, Lake Kawaguchi or Oishi Park, and the Fuji 5th Station when the road is open. Lunch is usually extra.

    The tour is cheaper than the train version and only slightly more than the bus version — and the bus version leaves you standing at bus stops in Kawaguchiko working out timetables.

    Book the tour

    Full-day coach tours from Tokyo, around ¥7,500–8,500 with a guide and 3–4 stops. Cancellation is usually free up to 24 hours ahead.

    See Mt. Fuji day tours →

    The Fuji Excursion problem

    If you do want the train, know how it works. The Fuji Excursion runs Shinjuku to Kawaguchiko direct in about 1 hour 53 minutes for roughly ¥4,130 each way. It’s comfortable, it’s scenic, and it is entirely reserved — there is no non-reserved carriage to fall back on.

    Reservations open exactly one month before your travel date, at 10:00 Japan time. Convenient daytime departures on weekends disappear fast, and during Golden Week and Obon they can go in a day. Set an alarm for that 10:00 window, or plan around the highway bus.

    If it’s sold out: the highway bus from Busta Shinjuku costs from about ¥2,200 and takes 1 hour 35 minutes. It’s not romantic, but it’s cheaper, more frequent, and often faster.

    The 5th Station, honestly

    Most day-trippers who go up Mt. Fuji don’t climb it — they ride a bus to the 5th Station at 2,300m, look at the view, buy something, and come back down. That’s a perfectly good day and requires no permit, no fee and no fitness.

    Two things to know for summer 2026:

    • Private cars are banned on the Fuji Subaru Line from 3 July to 10 September 2026. A shuttle bus runs from Fuji-Hokuroku Parking, ¥3,400 round trip. This is why tours pick you up in Tokyo rather than expecting you to drive.
    • The ¥4,000 trail fee and 4,000-climbers-a-day cap that made the news apply to people climbing past the 5th Station, not visitors. If you’re not going above the gate, it doesn’t concern you.

    Outside the summer season the road can close entirely for snow, which is why good tours state upfront that they’ll substitute Arakurayama Sengen Park or Oishi Park if the 5th Station isn’t reachable. That flexibility is a genuine argument for booking a tour rather than building a DIY plan around a road that might be shut.

    Will you actually see Mt. Fuji?

    This is the part most guides skip. Long-run observation data puts full visibility at roughly 140–155 days a year. The pattern is consistent and worth planning around:

    • Best months: November to February. Cold, dry air, and a genuine coin-flip chance or better on any given day.
    • Worst months: June to August. Summer humidity builds cloud around the peak even on days that feel gloriously sunny in Tokyo.
    • Best time of day, always: early morning. Convective cloud builds as the ground warms, so the mountain that was crisp at 8am is often gone by 1pm.

    That last point quietly settles the tour-versus-DIY question for a lot of people. Coach tours leave Tokyo at 7–8am precisely because of it. A DIY day that starts with a 9:30 train arrives at the good viewpoints right as the cloud does.

    About that pagoda photo

    Arakurayama Sengen Park — the five-storey pagoda with Fuji behind it — is on every Japan mood board, and everyone who saw that mood board is now in the queue. At peak times the viewing deck can involve waits approaching two hours. The crowding got serious enough that the town cancelled the park’s 2026 cherry blossom festival outright.

    It’s still worth doing. Just go early, and go knowing that the postcard was taken at 6am on a Tuesday in December.

    Which is right for you

    • Solo traveller, one day, first visit → Tour. Cheapest, simplest, someone else watches the clock.
    • Couple with a flexible schedule → Tour on a weekday, unless you’re staying over.
    • Family with young kids → Private car or DIY. A ten-hour coach day with fixed stops is a long time to be trapped with a bored six-year-old. A private tour split three or four ways is often reasonable.
    • Staying overnight in Kawaguchiko → DIY, obviously. Buy the 2-day bus pass, go up the ropeway at sunset, and get the clear morning to yourself.
    • You mostly want the mountain in a photograph → Go in winter, go early, and consider that a Hakone day gets you Fuji views plus an onsen. (We compared Hakone, Nikko and Kamakura here.)

    FAQ

    Can I use a Japan Rail Pass for this?
    Only partway. The Fuji Excursion runs onto the private Fujikyu line beyond Otsuki, and that section isn’t covered — expect to pay the difference. Whether a rail pass makes sense for your trip at all is a separate calculation, which we did here.

    Is one day enough?
    For a first look, yes. For the Fuji Five Lakes properly, no — two days with a night in Kawaguchiko is the version people come back raving about.

    What if the weather is bad?
    Tours run regardless and swap stops as needed. If you’ve booked DIY train tickets and wake up to rain, you’re committed. That asymmetry is worth something.

    Is the 5th Station worth it if I can’t see the summit?
    Honestly, not really. It’s a car park with shops at high altitude. On a clouded day, Oshino Hakkai and the lakeside are better use of the hours.

    The bottom line

    For a single day from Tokyo, book the coach tour: it costs less than assembling the same day yourself, it starts early enough to beat the cloud, and it reroutes itself when the mountain road is closed. Go DIY when you’re staying the night, travelling with small children, or you genuinely want to sit in a comfortable train and watch Japan go past.

    And go in winter if you can. The mountain shows up.

    Ready to book

    Tours sell out on weekends in autumn and spring. Check what is left for your dates.

    Check tour dates and prices →


    Fares and tour prices as of August 2026 and revised regularly — confirm before booking. Corrections via the contact page. Some links here are paid affiliate links.
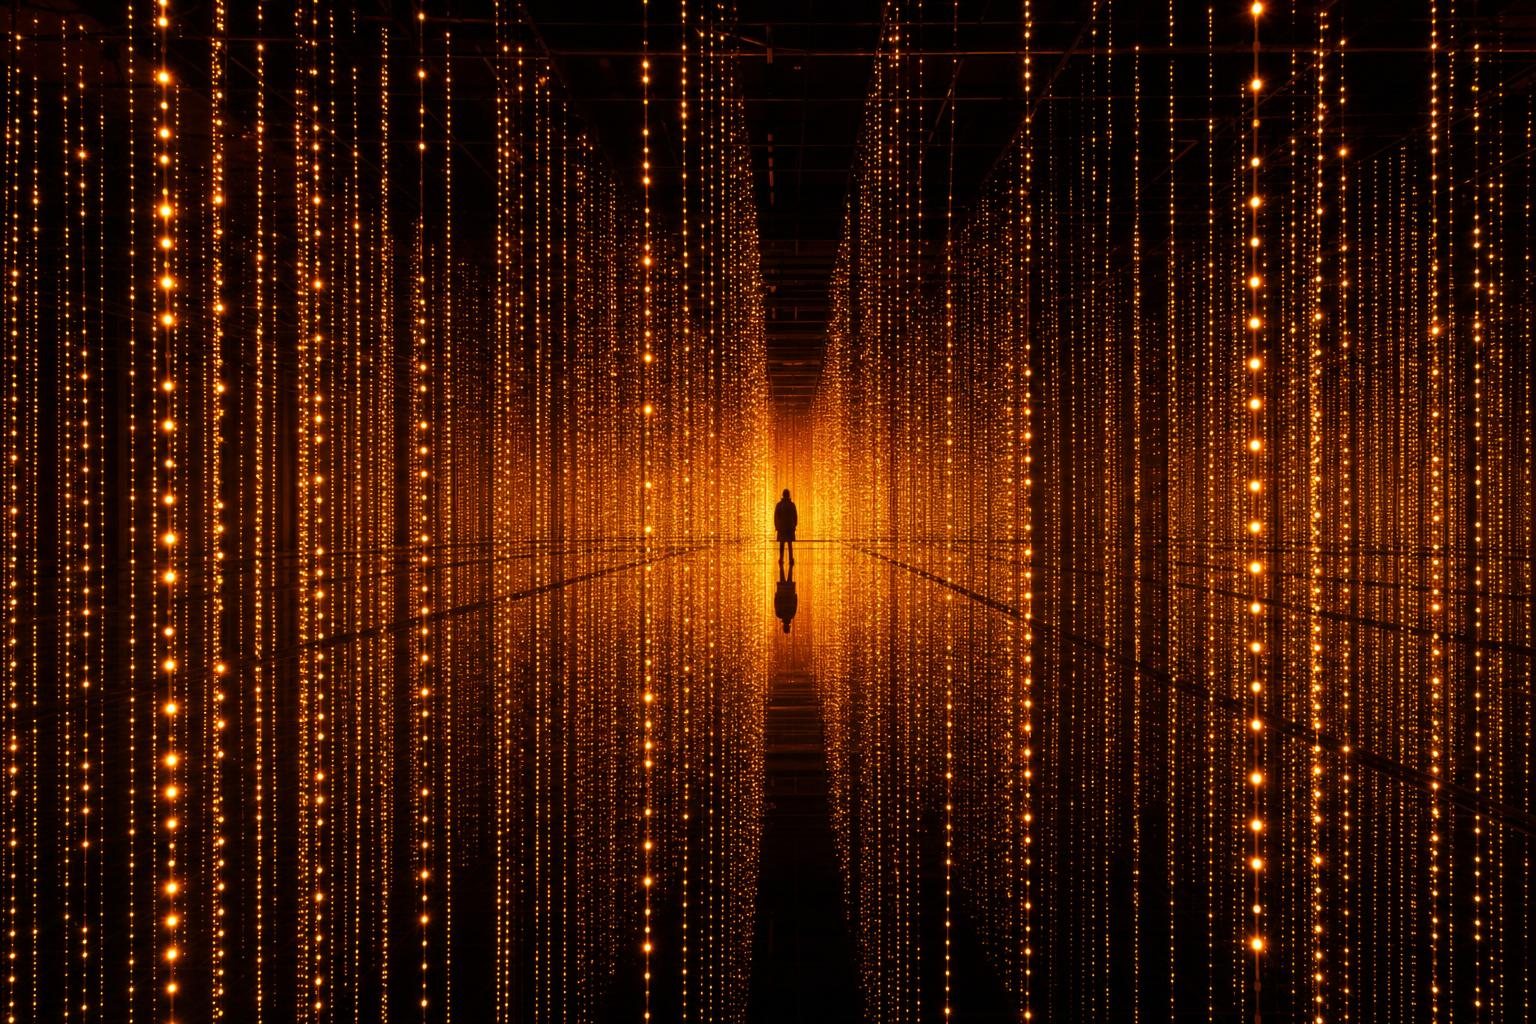
  • teamLab Planets or Borderless? How to Pick (2026)

    teamLab Planets or Borderless? How to Pick (2026)

    Both are extraordinary. Only one fits your trip. Here’s how to pick in 30 seconds — then the details, if you want them.

    The call

    Choose teamLab Planets if you want to feel the art — you’ll be barefoot, wading through knee-deep water, lying on your back under projected flowers. It’s shorter (1.5–2 hours), it’s a single fixed path, and it’s the better first-timer’s teamLab.

    Choose teamLab Borderless if you want to get lost in the art — no map, no route, 75-plus works that spill into each other and move between rooms. It’s longer (2–3 hours), more cerebral, and better if you’re the type who reads every museum label.

    Doing both? Genuinely fine — they share a name and a studio but almost nothing else. Just don’t do them on the same day. Two sets of infinite mirror rooms in one afternoon is more than a brain wants.

    Two teamLabs, two entirely different afternoons PLANETS Toyosu Barefoot. In the water. One fixed path. 1.5–2 hours Best for: first-timers, kids, a tight schedule BORDERLESS Azabudai Hills Shoes on. No water. No map at all. 2–3 hours Best for: wanderers, repeat visitors, long afternoons Both indoor · both timed-entry · book weeks ahead

    The comparison, side by side

    teamLab Planets teamLab Borderless
    Where Toyosu — 1 min from Shin-Toyosu Stn (Yurikamome) Azabudai Hills — 2 min from Kamiyacho Stn (Hibiya Line)
    Adult ticket from ¥3,600 (dynamic, to ~¥4,800) ¥3,600–5,600 (dynamic)
    Kids 4–12 ¥1,500 ¥1,500 and up
    Time needed 1.5–2 hours 2–3 hours
    Route One-way, linear No map, wander freely
    Water Yes — barefoot, knee-deep None
    Hours 8:00–22:00 ~10:00–21:00, closed 1st & 3rd Tue
    Running until End of 2027 (confirmed) Permanent, no end date

    Both use dynamic pricing — the same ticket costs more on a Saturday afternoon than a Tuesday morning. Check the official sites for your exact date.

    Get tickets

    Both museums sell timed slots that disappear weeks ahead. Klook is an authorised seller for both and shows the remaining slots in one place.

    Check teamLab ticket availability →

    Or book direct: Planets official · Borderless official

    What Planets actually feels like

    You take off your shoes and socks at the entrance and don’t put them back on for two hours. That’s the whole design principle: the art meets your skin.

    You wade through a dark room where projected koi swim around your legs and burst into flowers when they touch you. You lie down on a mirrored floor under a canopy of thousands of hanging orchids that descends toward your face. You climb through an inflatable landscape that behaves like a bouncy castle designed by someone who has read too much philosophy.

    Practically: wear or bring shorts. The water goes above the knee in places, and while there are free rental shorts (XS to 6L) and towels, you don’t want to spend your visit in a queue for them. Wet clothes will block you from the next room until you change. If you’re wearing a skirt, note that several floors are mirrors — the same free shorts solve it.

    It’s the more photogenic of the two in the obvious Instagram sense — the water-and-light rooms are absurd in the best way. It’s also the more physical: 2.5 million people came in 2025, and the crowd moves as one along the fixed path, which is both efficient and, at peak times, a bit like a very beautiful conveyor belt.

    What Borderless actually feels like

    There is no map. That is not an oversight — the works wander out of their rooms, walk down corridors, and interrupt each other. You are meant to be slightly lost.

    The upside: genuine discovery, and rooms you stumble into that you’d never have found on a route. The downside, and it’s a real one, is that the most famous work — the Infinite Crystal Universe, all suspended LED strings — can be hard to locate and can carry a queue of an hour or more at peak times. Visitors say this consistently.

    Through October 8, 2026, Borderless is running On the Asymmetry of the Universe in the reopened Light Sculpture – Flow room, with new series that haven’t been shown before. If you’re deciding between the two and you like a bit of novelty, that tips it.

    No water here, so no shorts required — but the mirrored floors are extensive. Trousers are the low-stress choice.

    Which one for whom

    • Young kids → Planets, with a caveat. The linear path means you can’t lose them, and the Athletics Forest is a genuine playground. But it’s dark, the floors are wet, and there’s a minimum height requirement for the water works (small children get carried). Under-13s need an adult.
    • Teenagers → Either. Borderless if they’re the moody-artistic kind, Planets if they want the photos.
    • Rainy day → Both are fully indoor. Slight edge to Borderless: Planets’ outdoor queue area has limited shelter, and standing in the rain before taking your shoes off is a poor start.
    • Limited time in Tokyo → Planets. Two hours, done, and Toyosu Market is next door for lunch.
    • You’ve been to a teamLab exhibition abroad → Borderless. The permanent Tokyo works go further than the travelling shows.
    • Mobility concerns → Planets involves uneven, wet, sloped surfaces and barefoot walking. Borderless is easier underfoot but involves more total walking and nowhere obvious to sit.

    Booking: the part people get wrong

    Both sell timed entry slots, released roughly two to three months ahead. Weekend and holiday slots can vanish within days of release during cherry blossom season, Golden Week, Obon and New Year.

    • Weekday visit: book about a month ahead
    • Weekend or peak season: book 2–3 months ahead
    • Same-day tickets: don’t plan on it. Planets sells no tickets on site at all. Borderless has a booth, but treat any stock as a lucky accident.
    • If your preferred time is gone: try the very first slot of the day or a late evening one. Both are less contested and — this matters — noticeably less crowded inside.

    Only the official sites and Klook are authorised sellers. Anything else is a reseller adding a margin, at best.

    FAQ

    Are they worth ¥3,600–5,600?
    For a first visit, most people say yes — including people who went in sceptical about “digital art.” For a second visit to the same venue, opinions cool considerably. If you have one teamLab in you, make it count.

    Can I do both in one day?
    Physically yes — they’re about 40 minutes apart by train. But it’s a lot of dark rooms and infinite mirrors for one nervous system, and you’ll stop noticing things. Split them across two days if you can.

    How crowded is it really?
    Planets had 2.5 million visitors in 2025, Borderless 1.7 million. Assume crowds at any midday weekend slot. The first slot of the day is the single most effective fix.

    Is the photography as good as the photos suggest?
    Mostly. Phones handle these rooms surprisingly well, because the art is the light source. Bring a lens cloth for Planets — humidity and spray are real.

    Will Planets close?
    It’s confirmed to run through the end of 2027. It has been extended several times from an original 2020 closing date, so treat closing announcements with some scepticism — but don’t count on another reprieve either.

    The bottom line

    Planets for the body, Borderless for the wander. If someone forced us to pick one for a first-time visitor with a packed Tokyo itinerary: Planets — it’s shorter, it’s easier to fit in, and walking barefoot through a river of digital koi is the thing you’ll actually describe to people back home.


    Prices and hours as of August 2026, and both venues use dynamic pricing — confirm on the official site for your date. Corrections via the contact page. Some links here are paid affiliate links.
    Book before you forget

    Weekend slots at both museums vanish weeks ahead. Klook is an authorised seller for both and shows what is left in one place.

    Check teamLab availability →

  • Tokyo Day Trips, Decided: Hakone vs Nikko vs Kamakura (2026)

    Tokyo Day Trips, Decided: Hakone vs Nikko vs Kamakura (2026)

    The short answer: only have energy for one? Kamakura. Chasing the “real Japan” postcard? Nikko. Want onsen steam and a shot at Mt. Fuji? Hakone — but it’s the most expensive and the most weather-dependent of the three.

    Every Tokyo itinerary has a “day trip?” slot, and everyone asks the same three names. They’re all good. They’re also completely different trips wearing the same label — and 2026 fare hikes changed the math on two of them. Let’s decide properly.

    Three day trips, one honest picture Hakone ~90 min ・ onsen & Fuji views day cost w/ pass: ~¥9,000+ Nikko ~110 min ・ shrines & nature round trip: ~¥6,300–6,700 TOKYO Kamakura ~55 min ・ temples & sea ・ ~¥2,900 all-in Tired? → Kamakura wins.
    Times from central Tokyo; costs assume 2026 fares (several rose this year).

    If you would rather not plan it

    Guided day tours to all three leave central Tokyo each morning with the train logistics handled — the sensible option for Nikko in particular, where two railway companies share the route.

    See Tokyo day trips →

    Kamakura: the effortless one

    ~55 min from Tokyo Station (¥1,040 on the JR Yokosuka line), no reservations, no planning. Great Buddha, temple-hopping, the Enoden tram along the sea (¥800 day pass), surfers at dusk. It’s the day trip that behaves like a neighborhood stroll — which is exactly why locals do it on a whim.

    Skip it if… you hate crowds and can only go on a weekend — it’s Tokyo’s favorite escape for a reason. Go on a weekday, arrive before 10am.

    Local Test: this is where Tokyo people actually take visiting friends first. Low stakes, high hit rate.

    Nikko: the grand one

    ~110 min from Asakusa on the Tobu limited express (~¥3,050–3,250 one way, reserved). Toshogu Shrine is the most spectacular religious complex in eastern Japan, and the lake-and-waterfall upland behind it feels like another prefecture. This is the “I can’t believe this is a day trip” option.

    Skip it if… you’re already templed-out from Kyoto, or you’re visiting in deep winter without warm layers — it’s mountain-cold up there.

    Know: the old paper day-passes were discontinued in 2025; ticketing is app-based now (or the tourist-only NIKKO PASS at ¥8,000/4 days if you’re staying over). Old blogs will confidently mislead you here.

    Hakone: the scenic circus

    ~90 min from Shinjuku on the Odakyu Romancecar (~¥2,470, reserved). The famous loop: mountain railway → cable car → ropeway over volcanic steam → “pirate ship” across the lake, with onsen and museums scattered along it. On a clear day, Fuji photobombs everything.

    The money part, honestly: the Hakone Free Pass is now ¥7,100 (2 days, from Shinjuku — it jumped from ¥6,100 in late 2025), plus the Romancecar surcharge. A full Hakone day realistically runs ¥9,000+. Worth it if you ride the whole loop; poor value if you just want one onsen and lunch.

    Skip it if… the forecast is cloudy (no Fuji, foggy ropeway = you paid ¥9,000 for mist), or you dislike queueing — the loop bottlenecks on weekends.

    The comparison, side by side

    Kamakura Nikko Hakone
    Door-to-door ~55 min ~110 min ~90 min
    Realistic day cost (transport+passes) ~¥2,900 ~¥6,500 + entries ~¥9,000+
    Planning needed None Reserve express seats Reserve Romancecar; check weather
    Weather risk Low Medium High (it’s all views)
    Best for Easy charm, sea air Grandeur, nature Onsen, Fuji, variety

    FAQ

    Can I do two of these in one trip?
    Yes, comfortably — most people pair Kamakura (light day) with either Nikko or Hakone (big day). Doing all three usually means you needed another Tokyo day instead.

    Hakone or Fuji Five Lakes for seeing Mt. Fuji?
    For a guaranteed attempt at Fuji views, Kawaguchiko is more direct — but it’s a longer, bus-heavy day. Hakone gives you a full day of things to do even when Fuji hides.

    Is the JR Pass useful for these?
    Mostly no — Kamakura is cheap anyway, and Nikko/Hakone run on private railways the pass doesn’t cover. (The pass math lives here.)

    Should I stay overnight instead?
    Hakone, yes if you can — an onsen ryokan night is a different (better) experience than the day-trip sprint. Kamakura and Nikko day-trip cleanly.

    The bottom line

    Kamakura when you want ease, Nikko when you want awe, Hakone when you want the full scenic production and the weather agrees. And if you’re reading this the night before, exhausted, at 11pm in a Shinjuku hotel: Kamakura. Trust us.

    If you’d rather not think about trains at all: guided day-tour versions of all three — bus, guide, lunch handled — are on Klook. Worth considering for Nikko especially, where the two-company train situation demands the most attention.

    Book a day trip

    Guided day tours to Hakone, Nikko and Kamakura leave central Tokyo each morning, with the train logistics handled.

    See Tokyo day trips →


    Fares as of August 2026 — Odakyu, Tobu and JR East all revised prices within the last year, so treat older guides’ numbers with suspicion. Corrections via the contact page. Some links here are paid affiliate links.
  • Narita vs Haneda: Getting Into Tokyo, Decided (2026 Prices)

    Narita vs Haneda: Getting Into Tokyo, Decided (2026 Prices)

    The short answer: from Haneda, just take the Keikyu line (¥330, 15 minutes to Shinagawa) and stop overthinking. From Narita, pick by budget: the ¥1,500 TYO-NRT bus if you’re patient, the Skyliner if you’re not, the N’EX round-trip ticket if your hotel is on the Yamanote west side.

    Which airport you land at was decided months ago by your airline. What’s still yours to decide is the next 60–100 minutes — and this is one of those choices where the “premium” option is sometimes worse. Here’s the whole picture, with 2026 prices (several went up this year; old blog posts are wrong).

    Landing at Haneda: you’ve already won

    Haneda is functionally in Tokyo. Two rail options, both cheap, both fast:

    Route Price Time Best when
    Keikyu line → Shinagawa ¥330 ~15 min Almost always. Shinagawa connects to the Yamanote loop and the Shinkansen
    Monorail → Hamamatsucho ¥520 ~18 min Hotels on the east/south Yamanote; great bay views as a bonus
    Limousine bus → Shinjuku ¥1,400 40–60 min Mountains of luggage, kids asleep, hotel is a bus stop

    With an IC card (sorted here) you just tap in — no ticket buying, no reservations. This is why we rate Shinagawa-side hotels for Haneda arrivals.

    Landing at Narita: pick your fighter

    Narita is 60–80km out. Four real options:

    Route Price Time Best when
    AIRPORT BUS TYO-NRT → Tokyo Sta./Ginza ¥1,500 ~65–90 min Best yen-per-km in Japan. No reservation, just queue. Late-night runs cost ¥3,000
    Skyliner → Ueno/Nippori ¥2,580 (¥2,310 online) 41 min Fastest into the city. Hotels on the north/east side (Ueno, Asakusa). Buy online, save ¥270
    N’EX → Tokyo/Shinagawa/Shibuya/Shinjuku ¥3,140–3,330 one-way — but ¥5,200 round trip (tourist ticket, 14 days) 60–90 min Hotels on the west side (Shinjuku/Shibuya) and flying out of Narita too — the round-trip deal is the quiet winner
    Keisei Access Express ~¥1,310 ~60 min to Ueno Budget rail without bus queues; direct to Asakusa too

    The honest matrix: Asakusa/Ueno hotel → Skyliner or Access Express. Shinjuku/Shibuya hotel → N’EX round-trip. Tokyo Station/Ginza → the ¥1,500 bus and pocket the difference. Traveling at 5am or after midnight → the late-night bus is basically your only friend.

    If it’s late, you’re jetlagged, or there are four of you

    A pre-booked private transfer meets you at arrivals with your name on a sign and costs about the same as a taxi — roughly ¥20,000–30,000 from Narita, ¥8,000–12,000 from Haneda, for the whole car. For families and midnight landings it’s the sane option.

    Book a private transfer →

    Skyliner and N’EX tickets can also be pre-bought on Klook, which saves the ticket-machine queue after a long flight.

    Three mistakes we watch people make weekly

    1. Buying N’EX one-way at ¥3,330 when the ¥5,200 round-trip exists. If you arrive and depart via Narita within 14 days, this is a 22% discount hiding in plain sight
    2. Taking a taxi from Narita. ¥25,000–30,000. Unless there are five of you with a tuba, no
    3. Dragging three suitcases onto the Skyliner at rush hour. For heavy-luggage arrivals, consider the bus — or better, send the bags ahead from the airport counter (same-day to central Tokyo if you land before ~11:00) and ride any train like a free human being

    FAQ

    Is Haneda worth paying more for at booking time?
    Usually yes — ¥30–50 more per ticket buys you back 60+ minutes each way and cheaper ground transport. For short trips it’s the single best upgrade in Japan travel.

    Do I need to reserve airport trains?
    Skyliner and N’EX: yes, seats are reserved (buy at the counter/machine/online on arrival — easy). Keikyu, monorail, Access Express: no, tap and board.

    What about the “Narita Express is covered by the JR Pass” trick?
    True — if you already have a JR Pass that makes sense. Never buy the pass just for the airport run.

    The bottom line

    Haneda: tap your IC card, ride Keikyu, done. Narita: ¥1,500 bus for value, Skyliner for speed to the east side, N’EX round-trip for the west side. Put the saved money where it belongs — your first proper bowl of ramen.


    Prices as of August 2026 (several operators raised fares in 2025–2026; older guides quote stale numbers). Corrections via the contact page. Some links here are paid affiliate links.
    Landing late, or with a family

    A pre-booked private transfer meets you at arrivals with your name on a sign, for roughly what a taxi costs — and you do not queue for a ticket machine at midnight.

    Book an airport transfer →

  • Where to Stay in Tokyo (2026): Pick Your Base in Five Questions

    Where to Stay in Tokyo (2026): Pick Your Base in Five Questions

    Some links on this site may become affiliate links once our partner applications are approved. Recommendations don’t change either way.

    The short answer: stay on the Yamanote loop line, and for a first trip, make it Shinjuku or the Tokyo Station side. Everything else is trade-offs — and that’s what this page settles.

    Tokyo doesn’t have one “downtown.” It has a ring of them, connected by the JR Yamanote line, and picking your base is genuinely the highest-stakes decision of your trip: it decides how tired you are at 9pm every single night. I live here; here’s how I’d actually choose.

    The one rule before anything else

    Stay on (or one stop from) the Yamanote line. A hotel ¥3,000 cheaper but two transfers away quietly costs you 40 minutes and a train squeeze every day. In 2026, with Tokyo hotel rates at record highs (mid-range now averages roughly ¥25,000 a night, basic business hotels ¥12,000–18,000), the temptation to drift off-loop is real — resist it, or drift smart (more below).

    The Yamanote Loop, simplified stay on the ring — pick your side Shinjukueverything, loud Shibuyayoung, hills ShinagawaHaneda + Shinkansen Tokyo St.day trips, calm Uenobudget, Narita Ikebukuro value Asakusa old Tokyo, off-loop nightlife & energy access & order value
    Rough positions, honest trade-offs. Full table below.

    The comparison table

    Area Vibe Price Best for Skip it if…
    Shinjuku Everything, all at once ¥¥¥ First-timers, nightlife + day trips (direct trains to Hakone/Kawaguchiko) …you’re a light sleeper who hates crowds. The station is a boss battle
    Tokyo Station / Ginza Polished, calm at night ¥¥¥¥ Shinkansen day trips, Disney, families who value order …you want the neon. It goes quiet after 9pm
    Shibuya Young, loud, iconic ¥¥¥¥ Nightlife, shopping, first-Instagram-then-sleep energy …you have big suitcases. The hills and crowds punish luggage
    Asakusa / Ueno Old Tokyo, temples, markets ¥¥ Budget travelers, atmosphere, direct Skytree/Narita access …nightlife matters. Dinner options thin out early
    Ikebukuro Big, unfashionable, underrated ¥¥ Value hunters who still want the Yamanote line …you’re chasing “beautiful Tokyo.” It’s practical, not pretty
    Shinagawa / Hamamatsucho Business-hotel land ¥¥ Early Shinkansen, Haneda flights — the Local Test winner below …you want to walk out into excitement

    The Local Test: where Japanese travelers actually stay

    Here’s something the guidebooks won’t tell you: Japanese business travelers — the most price-and-efficiency-obsessed hotel bookers on earth — cluster in Shinagawa, Hamamatsucho, and Ikebukuro. Not because they’re glamorous, but because the access-per-yen is unbeatable: Yamanote line, airport links (Haneda via Keikyu/monorail), Shinkansen stops, and business hotels (Dormy Inn, Super Hotel, Tokyu Stay) that are clean, quiet, and ¥8,000–10,000 cheaper than the same room in Shibuya.

    If your trip is “out exploring all day, hotel is for sleeping” — copy them. Nobody regrets a Dormy Inn with a rooftop bath.

    Decide in five questions

    1. First time in Japan, one week, want it all? → Shinjuku. Endure the station; enjoy everything else
    2. Day trips to Kyoto/Nikko/Disney on the menu? → Tokyo Station side. Rolling out of bed onto a Shinkansen is a luxury worth paying for
    3. Budget under ¥15,000/night without leaving civilization? → Ueno or Ikebukuro
    4. Traveling with kids or big luggage? → Tokyo Station/Ginza or Shinagawa. Flat sidewalks, elevators, order
    5. Here for the night city? → Shibuya or Shinjuku’s east side, and accept the price

    Common mistakes

    Booking Asakusa for a nightlife trip. It’s wonderful — and mostly asleep by 21:00. Match the area to your evenings, not your daytime photos.

    Treating “near a station” as binary. “Near Shinjuku station” can still mean a 15-minute indoor labyrinth. Check the walk from the exit, not the station pin.

    Saving ¥2,000 by going off-loop. You’ll repay it in time, transfers, and 22:00 exhaustion. If you must save, save smart: Ikebukuro and Ueno are the sanctioned shortcuts.

    Ignoring Haneda vs Narita. Landing at Haneda? Shinagawa-side makes arrival day painless. Narita? Asakusa/Ueno (Keisei line) wins. Book the airport before the aesthetic.

    The bottom line

    Shinjuku if you want everything, Tokyo Station if you’re day-tripping, Ueno/Ikebukuro if you’re saving, Shinagawa if you’re flying or riding early — and always, always on the loop. Prices in 2026 are the highest Tokyo has ever charged; the way to win isn’t finding a mythical cheap gem, it’s refusing to pay for a location that doesn’t match how you’ll actually spend your evenings.

    Once the area is settled: the fastest way in from your airport, and which day trip fits the neighbourhood you chose.


    Price levels reflect Tokyo’s record-high 2026 rates (city ADR around ¥22,000; mid-range ~¥25,000) and will vary by season — cherry blossom and autumn weeks run far higher. Corrections welcome via the contact page.

  • Is the JR Pass Worth It in 2026? The Break-Even Math, Done For You

    Is the JR Pass Worth It in 2026? The Break-Even Math, Done For You

    Some links on this site may become affiliate links once our partner applications are approved. Recommendations don’t change either way.

    The short answer: for the classic Tokyo–Kyoto–Osaka trip, no. Since the 2023 price hike (a 69% jump that most old blog posts still haven’t caught up with), the nationwide Japan Rail Pass only pays off on long, multi-city itineraries — and for most real-world trips, a regional pass does the same job for half the price.

    I live in Japan, and this is the question visiting friends ask me most. So here’s the actual math, done honestly — including the cases where the pass does win.

    What the JR Pass costs now (as of Aug 2026)

    Duration Ordinary approx USD Green (1st class)
    7 days ¥50,000 ~$333 ¥70,000
    14 days ¥80,000 ~$533 ¥110,000
    21 days ¥100,000 ~$667 ¥140,000

    2026 heads-up: from October 1, 2026, passes bought through resellers (Klook, JRPass.com, travel agents) get a price bump — the 7-day goes to ¥53,000 — while the official site keeps current pricing. The official site also lets you reserve seats online before you land, and you can now pick up your pass at station ticket machines with just your passport. In 2026, buying anywhere other than the official site is hard to justify.

    The break-even math, three real itineraries

    Rule of thumb: you need to ride about ¥50,000 worth of trains in 7 days. Here’s what common trips actually cost with regular tickets (reserved seats, standard season):

    Check the current price first

    Prices and the regional alternatives change; Klook is an authorised seller and lists the nationwide pass and the regional ones on the same page, so you can compare before doing the maths below.

    Check JR Pass prices →

    Itinerary Regular tickets 7-day pass ¥50,000?
    A. Tokyo ⇄ Kyoto round trip ~¥28,000 No. You lose ~¥22,000
    B. Tokyo → Kyoto → Osaka → Hiroshima (one way) ~¥26,000 No. Half the pass goes unused
    C. Tokyo → Kyoto → Hiroshima → Tokyo loop + side trips ~¥45,000–51,000 Barely. Only with Nara/Miyajima/airport legs added

    That’s the uncomfortable truth: the itinerary 80% of first-timers actually take (scenario A or B) hasn’t justified the nationwide pass since 2023. Clear wins do exist — Tokyo→Kyoto→Fukuoka and back, or a 14-day nationwide loop — but they’re the exception, not the default.

    The Nozomi asterisk

    The pass doesn’t cover the fastest trains (Nozomi/Mizuho) — you either take the slightly slower Hikari/Sakura (about 30 minutes more Tokyo→Kyoto, perfectly pleasant), or pay a surcharge: ¥4,960 one-way Tokyo→Kyoto, ¥8,140 Tokyo→Hakata. Factor this in before you count on “unlimited” bullet trains.

    What to do instead: the regional pass cheat sheet

    This is where the real value hides in 2026 — and where most outdated guides fail you (JR East completely reorganized its passes in March 2026; prices below are current):

    Pass Price / days Sweet spot
    JR West Sanyo-San’in ¥23,000 / 7d Osaka→Himeji→Hiroshima→Fukuoka. Includes Nozomi/Mizuho on the Sanyo line — something the ¥50,000 nationwide pass can’t even do
    JR West Kansai Wide ¥12,000 / 5d Kyoto/Osaka base + Himeji, Kinosaki, Okayama day trips
    JR EAST PASS (new, unified) ¥35,000 / 5d ・ ¥50,000 / 10d Tokyo→Sendai→Aomori loops. A Tokyo–Shin-Aomori round trip alone (~¥36,000) beats the price
    JR Tokyo Wide ¥16,000 / 3d Nikko, Karuizawa, Kawaguchiko day trips from Tokyo
    JR All Kyushu ¥26,000 / 7d Fukuoka→Nagasaki→Kumamoto→Kagoshima

    Two more money-savers nobody tells you about: smartEX early-bird fares (book Tokaido Shinkansen 21+ days ahead for real discounts) and domestic flights — for Tokyo→Sapporo or Tokyo→Fukuoka, budget airlines and the airlines’ special visitor fares are usually cheaper and faster than rail.

    If the maths says yes

    Buy before you fly. The pass is issued as an exchange voucher and swapped for the real thing at a JR office in Japan — Klook is an authorised seller and the same price as buying direct. Regional passes are on the same page if the nationwide one didn’t add up.

    Buy the JR Pass →

    Common mistakes (please don’t)

    “The pass covers all trains in Japan.” Subways, city buses, and private railways (much of Kyoto sightseeing!) are not included.

    “I’ll use it around Tokyo.” City-level use can never recover ¥50,000. That’s what a Suica card is for.

    “Resellers are cheaper.” Roughly equal today; from October 2026, the official site is clearly cheaper — and it’s the only channel with advance online seat reservations.

    “That blog said ¥29,650.” That was the pre-October-2023 price. If a guide quotes it, close the tab — everything else in it is stale too.

    “Buy first, plan later.” Backwards. Fix your itinerary first, price the individual legs (Google Maps shows fares), then see which pass — if any — fits.

    The bottom line

    Buy the nationwide JR Pass only if your route already adds up — long loops, multiple distant cities, 14+ days of genuine movement. For the Golden Route, buy individual tickets or smartEX fares. Going deep into one region? A regional pass at ¥12,000–35,000 almost always wins.

    The pass isn’t a rip-off. It’s a specialist tool that most travelers were sold as a default — and in 2026, the default answer has changed.


    Prices verified August 2026 against official JR sources; fares change (JR East revised fares in March 2026). Spot an error? Tell us via the contact page — corrections matter more to us than being first. Some links here are paid affiliate links.
  • Best eSIM for Japan (2026): I Compared 6 Options So You Don’t Have To

    Best eSIM for Japan (2026): I Compared 6 Options So You Don’t Have To

    This post contains affiliate links (once our partner applications are approved). As someone living in Japan, I only recommend what actually works here.

    Here’s the thing nobody tells you about buying an eSIM for Japan: almost every “unlimited” plan has a hidden daily speed cap, and the differences between providers have less to do with price than with which Japanese network they ride on.

    I live in Japan. I’ve watched visiting friends fight with APN settings at the airport more times than I can count. So I dug into the six major eSIM options travelers actually buy — the real prices, the real speed caps, the real networks — and put it all in one place.

    The short version

    • Best overall: Airalo (Moshi Moshi) — cheapest reliable data, great app
    • Best network coverage: Ubigi — runs on docomo, the network that still works in the mountains
    • Best true unlimited: Holafly — if you refuse to count gigabytes
    • Best for first-timers: Klook eSIM — lives inside the app you’ll book tours with anyway

    The comparison table (prices as of Aug 2026)

    Provider Popular plans Network “Unlimited” fine print Tethering
    Airalo 10GB/30d $18 ・ Unlimited 15d $48 SoftBank + KDDI FUP applies Yes
    Ubigi 10GB/30d $16.50 ・ Unlimited 7d $25 docomo + KDDI 25–60GB then 2Mbps Yes, uncapped
    Holafly Unlimited only: 7d $27.50 ・ 15d $50.50 KDDI / SoftBank Closest to truly unlimited Only 1GB/day
    Klook eSIM ~$2/day unlimited ・ 1–50GB options SoftBank 5G / docomo 10GB/day, then 128kbps Yes
    Saily 5GB/30d $10.99 ・ Unlimited 15d $48.99 KDDI (reported) 5GB/day, then 1Mbps Yes
    Nomad 10GB $17 ・ Unlimited 7d $25 SoftBank + KDDI 2GB/day, then 1Mbps Check plan

    Prices fluctuate with promotions and exchange rates — treat these as ballpark figures and check the current price before you buy.

    Our pick

    Airalo runs on SoftBank and KDDI, has the best app of the group, and a 10–20GB plan covers most two-week trips.

    See Airalo Japan plans →

    The “unlimited” trap, explained honestly

    Read that fine-print column again. Klook’s unlimited plan throttles you to 128kbps after 10GB in a day (fine — 10GB is a lot). Nomad throttles after just 2GB per day (not fine if you’re uploading video). Holafly is the closest to genuinely unlimited, but caps tethering at 1GB per day — a dealbreaker if you plan to work from your laptop.

    None of these are scams; they’re just details that live three clicks deep on the checkout page. Match the cap to how you actually use data:

    • Maps + LINE + photos + translation ≈ 1–1.5GB/day → any 10–20GB plan covers a 2-week trip
    • Instagram stories + YouTube on trains → get a daily-unlimited type (Klook/Holafly)
    • Working remotely with a laptop → Ubigi (uncapped tethering) or a pocket WiFi

    Which Japanese network should you care about?

    In central Tokyo and Osaka: honestly, none. All three networks are excellent in cities.

    But if your itinerary includes Hakone, the Japan Alps, rural onsen towns, or long Shinkansen stretches, the local wisdom is consistent: docomo has the deepest rural coverage. That’s Ubigi’s quiet advantage, and why it’s my pick for anyone going beyond the Golden Route.

    Things that go wrong (and how to not let them)

    1. Turn Data Roaming ON for the eSIM line. Japan eSIMs work as roaming connections — this is the #1 “my eSIM doesn’t work” cause
    2. Install before you fly, activate after you land. The QR install needs internet; airport WiFi + jetlag is a bad combo
    3. Check your phone is carrier-unlocked (Settings → General → About → “No SIM restrictions”). Phones on US carrier payment plans are the usual victims
    4. These are all data-only — no Japanese phone number. That’s fine for 90% of travelers (restaurants take web bookings, LINE/WhatsApp handle calls), but know it before you need it
    5. One QR = one install. Don’t delete the eSIM profile mid-trip

    What about pocket WiFi or a physical SIM?

    • Groups of 3+: a pocket WiFi router (Ninja WiFi, ~¥440/day + options, 15 devices) often beats buying 4 eSIMs
    • Long stays (1–3 months) or “I want English support in Japan”: Sakura Mobile costs 2–3× more than a travel eSIM but comes with local English-language support
    • Everyone else: an eSIM wins on price and convenience. No counters, no return envelopes

    FAQ

    Do I need a Japanese phone number?
    Almost certainly not. Data-only is enough for maps, messaging apps, and web reservations. The rare exceptions: some phone-only restaurant reservations and delivery redelivery calls.

    How much data for a 2-week trip?
    10–20GB covers most people comfortably. Heavy social media users should pick a daily-unlimited plan instead of doing math.

    docomo, au, or SoftBank — which is best?
    Cities: no practical difference. Countryside and mountains: docomo, which means Ubigi.

    Why isn’t my eSIM working?
    In order: Data Roaming ON → correct line selected for data → APN set per your provider’s email → restart. That sequence fixes nearly everything.

    Can I tether my laptop?
    Airalo, Ubigi, Klook, Saily: yes. Holafly: only 1GB/day. If tethering is your lifeline, choose Ubigi.

    The bottom line

    For most trips: Airalo’s 10–20GB plan is the safe, cheap default. Going rural: Ubigi. Refusing to think about data at all: Holafly, as long as you don’t tether. Booking everything through Klook anyway: their eSIM keeps it all in one app.

    Whatever you pick, install it the night before your flight — future-you at baggage claim will be grateful.

    Sort it before you fly

    Install now, activate when you land. Takes about five minutes.

    Get a Japan eSIM →


    Prices and plan details checked in August 2026 and will change. This site is not affiliated with any carrier. Corrections welcome via the contact page. Some links here are paid affiliate links.